This is a quick update on the progress of the current projects on the table. The table currently has two jackets on the go, one is mine, the other belongs to Monkey Girl. I have set up my Mom's old machine (now Moneky Girl's) on the table back to back with mine. That way we can work at the same time on our jackets. We are both using hte same thread colours right now, so that makes it easier for me to help her out.
As I believe in learning by doing, she is doing the majority of the work on her own. She cut and prepped the pattern while I cut the fabric (that is due to her height not being quite up to reaching across the table and me not wanting her touching the Kais!). She pins the pieces together as she goes through the pattern, learning about how the pieces match up. She then stitches them together (reminding herself to backstitch) and tried her best to keep the seam allowance as close to 5/8" as she can (there is a masking tape line on the machine for her to follow). She now knows how to properly press the seams flat using my iron. Yes, Darrell, she even uses the clapper! The top stitching, button holes and collar I am doing for her but I think I will let her do the sleeve insertino as it is on the flat this time around. She may even do the cuffs as well. So far the bodice and the back is complete and stitched at the shoulders. I have to do the topstitching there and then we are off to assemble the sleeves. We have the collar and cuffs put together but not attached yet. She has stitched, trimmed, pressed and turned and then pressed again.
She wants a navy blue topstich for a real subtle contrast to the black. At least it would have been subtle had I not let her loose on Darrell's button wall last weekend! My Monkey took one look at the variety and went for BLING! Not just any bling, mind you, oh no, my darling diva went directly to the designer buttons! Of course, I have to admit, Darrell did have a lot to do with it! It was great fun as she tried the various buttons styles on her Wal Mart remnant fabric. She loved the Fendi buttons and almost went for major crystals and rhinstone flowers until we had to reign her in with a reminder that this will still be worn on the playground. Designer bling is too good for the playground. That was a close call but very fun to watch!
The next thing she did was to head directly for Darrell's silk samples. She fell in love with those from the first time in his shop. After fondling those for a bit, she went over to the display of garment Darrell has on sale. He chooses fabrics from his supply and then sews a number of his own designs as inspiration for his customer base. This way we can visualize what a garment will look like in a certain fabric. She fell in love with a couple of tops and proceeded to talk ME into buying one for her. The drama that ensued as she tried the various sizes on was quite hilarious! Darrell and I agree, there are some serious DIVA tendencies emerging in her personality! Will she be the next generation Sewing Diva? We will have to wait and see if she can bring her skill level up to THE Sewing Divas ... until then, I am not quite sure what to call her ... Monkey Girl is still there but there are occasional flashes of something bigger that I cannot quite identify.
One unforseen effect of teaching her how to sew, is that I have to reduce the directions to the most basic points. In teaching her how to do a project like this one, there are few shortcuts. Each step needs to be read , discussed and understood before we go on. She sees how things are put together step by step. This has slowed my sewing down somewhat, but I think that is a good thing for me. I am now looking at the details again as I stop my sewing to help her with her next step. I find myself explaining things to her. It has brought me back to why I started to sew in the first place. I like the construction of the garments. I love taking flat fabric and turning into a 3Dimensional object. I love that she sees what I see. The potential in every piece of cloth ... expecially the silks, right Darrell?
Monday, September 13, 2010
Tuesday, September 07, 2010
changes ...
School is now in session for the kids. Dino boy had minor stomach cramps last night; not sure if it was nerves, excitement or both. I think it was the latter. You see, he started Jr High today. Grade 7. Wow. Not only is he only one inch shorter than I am (YIKES HE IS ONLY 12), he is now at a combined jr/sr high. He gets up with his father and goes out the door at almost the same time. He will be home before anybody else in the afternoons. He is growing up (literally!). He is maturing in so many ways but still believes in embracing his inner child. He still wants a toy for Christmas, even if it is a small one. Just because it is Christmas and that needs a toy. I think that this change needs a new name. Dino Boy who used to grab his little dino toys and leave them in my bathtub or shower is no more. In his place? RUGBY GUY. This is more appropriate now. His new self confidence and height has earned him the new moniker, I think.
Monkey Girl is about to head off to school as well. This is her first year without Rugby Guy at the same school. She will be going alone now. What that means is that I won't let her leave quite so early as there is no early supervision at the school without big brother along. She is turning into a bit of a girlie girl, with her talk of clothes, earrings and her new summer obsession - nail polish. I like seeing these glimpses young woman she has the potential of becomming. Monkey Girl will need to change soon, too, I think. But not yet. I am not quite ready for that. Let me have my little girl for a little bit longer ... even if she is as proportionally as tall as her brother!
Monkey Girl is about to head off to school as well. This is her first year without Rugby Guy at the same school. She will be going alone now. What that means is that I won't let her leave quite so early as there is no early supervision at the school without big brother along. She is turning into a bit of a girlie girl, with her talk of clothes, earrings and her new summer obsession - nail polish. I like seeing these glimpses young woman she has the potential of becomming. Monkey Girl will need to change soon, too, I think. But not yet. I am not quite ready for that. Let me have my little girl for a little bit longer ... even if she is as proportionally as tall as her brother!
Monday, September 06, 2010
Labour Day Project
So, what are you doing this Labour Day? As was my practice years ago, I spent it sewing. Saturday I took off and went shopping with Monkey Girl. We spend a lot of time discussing body image and fashion vs trends as we shop. We try on everything just for the object lessons. We try not to laugh too loudly at what we affectionately label "CALL CLINTON moments" after her favorite show "What Not To Wear". I like these times together. She is growing up so fast and so tall that I need to have these discussions more often as she is soon to be out of the little girl sizes ( a feat she reached in her shoe size already!).
I think I may have mentionned in one of my posts last year that I have my mother's original SINGER machine now. We gave it to Monkey GIRL FOR Christmas last year with the promise that I would teach her to sew. The majority of what she wants to sew are knit projects, which that machine will not handle well. So, we are trying something different instead. She is making a jean style jacket. We are doing it in tandem, meaning that we have two machines on the same table with both of us working on jacket patterns. I am finishing a UFO (another HP project - the HP Sportive Skirt Suit Jacket). Hers is KS 3136. We are using a black peachskin fabric from Wal Mart for her first project. This is a great project for us to do together. It has many smaller straight seams which will allow her to get used to the machine as well as pinning, pressing and stitching. I have marked out the 5/8" seamline with masking tape on the machine bed, and am marking the seamline on the fabric for her as well. She cut and prepped the pattern on her own, and I cut the fabric and interfacing as required. She sews the seams, we press together and then I top stitch for her. We are lucky that we are both sewing the same colour fabric right now!
It is going really well! Her first seam had to be ripstitched, as she wanted to try to stitch it without a line to follow. She was a bit upset until I told her the story of my first Home Ec project do-over (the night before it was due in!). She laughed and started to rip as she kept giggling! We have the back assembled and have the fronts half done. We are at the stage of putting the chest pockets on. We will see how far we get tonight. She won't be wearing it to school this week, anyway. I promised her a trip to the Button Wall of Fame at Darrell's so that she can choose the buttons. Yup, the buttons will cost more than the jacket, but seeing the pride will be worth it! It is a neat feeling, seeing her across the table working on a project at the same time. Who says that sewing has to be solitary?
On my end, I have the body of the lining assembled, leaving the facings only to be attached. I am working on assembling the body of the jacket as well. I am using a black pinwhaled bamboo corduroy with an ambiance lining in a navy blue. The skirt was completed before the sewing drought started and was the last actual project completed before the Big Sulk started. I made this up in a cheap knit 3 years ago for an interview for the job I now have. Now, I am getting around to making the actual as the cheapness of the muslin is now showing. I took the rainbow zipper off the muslin and am using that in the jacket. I was originally going to use a rhinestone zip but think I may use that in another project instead.
So, this Labour Day, I engaged in a Labour of Love. I have started my 9 year old on a journey of sewing for herself. The feeling I get in sharing my space with her is so deep that I cannot find the words. I remember sitting at my mother's knee playing in the button box and wanting to sit on her lap and sew. I can't remember ever doing that, but I always wanted to. I played in her sewing room all the time when she worked on the various projects. Now Monkey Girl gets to work with me. As a new sewer emerges in the family, I am rediscovering the basics through the teaching process. I am rediscovering the love of the build and the satisfaction of the final product. May you all be so lucky as to be able to pass on your skills and love to a new generation ... I now know that my grandmother's thimble will be well loved and used by another young girl as she begins her wardrobe build!
I think I may have mentionned in one of my posts last year that I have my mother's original SINGER machine now. We gave it to Monkey GIRL FOR Christmas last year with the promise that I would teach her to sew. The majority of what she wants to sew are knit projects, which that machine will not handle well. So, we are trying something different instead. She is making a jean style jacket. We are doing it in tandem, meaning that we have two machines on the same table with both of us working on jacket patterns. I am finishing a UFO (another HP project - the HP Sportive Skirt Suit Jacket). Hers is KS 3136. We are using a black peachskin fabric from Wal Mart for her first project. This is a great project for us to do together. It has many smaller straight seams which will allow her to get used to the machine as well as pinning, pressing and stitching. I have marked out the 5/8" seamline with masking tape on the machine bed, and am marking the seamline on the fabric for her as well. She cut and prepped the pattern on her own, and I cut the fabric and interfacing as required. She sews the seams, we press together and then I top stitch for her. We are lucky that we are both sewing the same colour fabric right now!
It is going really well! Her first seam had to be ripstitched, as she wanted to try to stitch it without a line to follow. She was a bit upset until I told her the story of my first Home Ec project do-over (the night before it was due in!). She laughed and started to rip as she kept giggling! We have the back assembled and have the fronts half done. We are at the stage of putting the chest pockets on. We will see how far we get tonight. She won't be wearing it to school this week, anyway. I promised her a trip to the Button Wall of Fame at Darrell's so that she can choose the buttons. Yup, the buttons will cost more than the jacket, but seeing the pride will be worth it! It is a neat feeling, seeing her across the table working on a project at the same time. Who says that sewing has to be solitary?
On my end, I have the body of the lining assembled, leaving the facings only to be attached. I am working on assembling the body of the jacket as well. I am using a black pinwhaled bamboo corduroy with an ambiance lining in a navy blue. The skirt was completed before the sewing drought started and was the last actual project completed before the Big Sulk started. I made this up in a cheap knit 3 years ago for an interview for the job I now have. Now, I am getting around to making the actual as the cheapness of the muslin is now showing. I took the rainbow zipper off the muslin and am using that in the jacket. I was originally going to use a rhinestone zip but think I may use that in another project instead.
So, this Labour Day, I engaged in a Labour of Love. I have started my 9 year old on a journey of sewing for herself. The feeling I get in sharing my space with her is so deep that I cannot find the words. I remember sitting at my mother's knee playing in the button box and wanting to sit on her lap and sew. I can't remember ever doing that, but I always wanted to. I played in her sewing room all the time when she worked on the various projects. Now Monkey Girl gets to work with me. As a new sewer emerges in the family, I am rediscovering the basics through the teaching process. I am rediscovering the love of the build and the satisfaction of the final product. May you all be so lucky as to be able to pass on your skills and love to a new generation ... I now know that my grandmother's thimble will be well loved and used by another young girl as she begins her wardrobe build!
Challenge Complete!
The dress is done and I even have photos ready to post!
The project was the HP Plain & Simple T SHIRT DRESS (See here for pattern link) (not to be confused with the P&S Shirt Dress of a previous pattern release!). I chose it as it was an easy style to make and wear for Sunday Mass or for those days when I just don't want to wear pants. This should have been an easy project as it is basically a longer version of a Polo shirt with a hidden button placket with the addition of a self tie belt. Designed for good quality knits, it ws perfect for a stash project as I have a good supply on hand.
HP designs are not for the beginner. Trudy has said that from the day she launched her line. She assumes a certain amount of knowledge in her sewer. I am not a beginner. I would say that at my peak two years ago, I was close to being advanced, and had I not stopped sewing, I would have gotten there (and will get there)with the completion of that tailored blazer I started with Darrell. Rebooting a lapsed sewing brain with a hidden placket on a pattern that has minimal instructions and drawings was probably not my best choice. In the spirit of full disclosure, I will admit that the hidden placekt part of the patten really didn't register until I was too forgone in the cutting to stop. It was at that point that I started the book searches and the internet searches to try to find help. The first incarnation of the placket had me following the directions, but I must have missed something. The placket did not lie flat. It could have been something as simple as me using a knit that was a bit too bulky when layered three times. Maybe I missed a step somewhere. After all, I have made so many of these tops, that I confess I really didn't give that in depth of a look at the instructions.... ahem. yup. got cured of that real quick on this project!
So, I recut the bodice out of the remaining fabric and started over. I thought that I could modify David P Coffin's placket design to include a hiddne placket and use that method instead. Works in theory and in the paper mock up. Once put into practice, however, there was just too much fabric at the bottom of the placket. I just didn't like it. So, I tossed the whole thing in the fabric scrap bin and went to bed. I do my best redesign work as I am in bed at night while the Pilot is snoring.
Inspiration struck two nights later. I went downstairs and grabbed the pieces and scraps and cut out the offending placket. I cut it on the line where a shoulder princess seam would lie (or thereabouts) and took it down below the placket bottom. I then took some black fabric and pinned it in as a cowl neck inset. I liked it a lot! Then I thought the black migh tbe a bit too dark for late summer early fall, so I grabbed some scraps of the original fabric and played. I took the piece I cut out and laid it in half on it's CF. Then I traced the bottom of it and then rotated the piece to the left to allow for the cowl neck. There is my new pattern piece. I cut it out and then added it in. Love it! It does not have as much cowl as the original drape and the inset is also a bit wider, but I am happy with it all the same. Rather than tying the belt, I found a belt buckle that matches colour wise and simply thread it through. I may eventually sew the buckle on and shorten it. For now, I like the way it lies flat on a body that is not so flat anymore. I did have to take the dress in a bit on the side seams, but that is because I added some in the cutting phase "just in case". The only thing I haven't improved on yet, but plan on doing, is to shape the CB seam below the yoke. It is straight. I am not. It needs some shaping to rid me of the extra fabric at the back.
So, here it is. The inset could have been a tad bit wider to allow for the twins as I see some stretching there, but that can be eliminated by wearing a different bra as well. There is too much fluff at the hips (both on me and the dress) so I think any future renditions will need a bit more flare at that point to make it more flattering. Will I sew this again? Maybe. I may try a different pattern version as I have one in an older WOF mag that I haven't tried. I am trying to use as many new patterns in the stash as I can for now. I may just use one of my TNT polo patterns instead and add a more A Line skirt to it. Will have to wait and see!
Sorry for the photo layout, I am still getting used to the laptop buttons and the lack of a mouse. Give me time .... My collarless version of the P&S T Shirt Dress:

The project was the HP Plain & Simple T SHIRT DRESS (See here for pattern link) (not to be confused with the P&S Shirt Dress of a previous pattern release!). I chose it as it was an easy style to make and wear for Sunday Mass or for those days when I just don't want to wear pants. This should have been an easy project as it is basically a longer version of a Polo shirt with a hidden button placket with the addition of a self tie belt. Designed for good quality knits, it ws perfect for a stash project as I have a good supply on hand.
HP designs are not for the beginner. Trudy has said that from the day she launched her line. She assumes a certain amount of knowledge in her sewer. I am not a beginner. I would say that at my peak two years ago, I was close to being advanced, and had I not stopped sewing, I would have gotten there (and will get there)with the completion of that tailored blazer I started with Darrell. Rebooting a lapsed sewing brain with a hidden placket on a pattern that has minimal instructions and drawings was probably not my best choice. In the spirit of full disclosure, I will admit that the hidden placekt part of the patten really didn't register until I was too forgone in the cutting to stop. It was at that point that I started the book searches and the internet searches to try to find help. The first incarnation of the placket had me following the directions, but I must have missed something. The placket did not lie flat. It could have been something as simple as me using a knit that was a bit too bulky when layered three times. Maybe I missed a step somewhere. After all, I have made so many of these tops, that I confess I really didn't give that in depth of a look at the instructions.... ahem. yup. got cured of that real quick on this project!
So, I recut the bodice out of the remaining fabric and started over. I thought that I could modify David P Coffin's placket design to include a hiddne placket and use that method instead. Works in theory and in the paper mock up. Once put into practice, however, there was just too much fabric at the bottom of the placket. I just didn't like it. So, I tossed the whole thing in the fabric scrap bin and went to bed. I do my best redesign work as I am in bed at night while the Pilot is snoring.
Inspiration struck two nights later. I went downstairs and grabbed the pieces and scraps and cut out the offending placket. I cut it on the line where a shoulder princess seam would lie (or thereabouts) and took it down below the placket bottom. I then took some black fabric and pinned it in as a cowl neck inset. I liked it a lot! Then I thought the black migh tbe a bit too dark for late summer early fall, so I grabbed some scraps of the original fabric and played. I took the piece I cut out and laid it in half on it's CF. Then I traced the bottom of it and then rotated the piece to the left to allow for the cowl neck. There is my new pattern piece. I cut it out and then added it in. Love it! It does not have as much cowl as the original drape and the inset is also a bit wider, but I am happy with it all the same. Rather than tying the belt, I found a belt buckle that matches colour wise and simply thread it through. I may eventually sew the buckle on and shorten it. For now, I like the way it lies flat on a body that is not so flat anymore. I did have to take the dress in a bit on the side seams, but that is because I added some in the cutting phase "just in case". The only thing I haven't improved on yet, but plan on doing, is to shape the CB seam below the yoke. It is straight. I am not. It needs some shaping to rid me of the extra fabric at the back.
So, here it is. The inset could have been a tad bit wider to allow for the twins as I see some stretching there, but that can be eliminated by wearing a different bra as well. There is too much fluff at the hips (both on me and the dress) so I think any future renditions will need a bit more flare at that point to make it more flattering. Will I sew this again? Maybe. I may try a different pattern version as I have one in an older WOF mag that I haven't tried. I am trying to use as many new patterns in the stash as I can for now. I may just use one of my TNT polo patterns instead and add a more A Line skirt to it. Will have to wait and see!
Sorry for the photo layout, I am still getting used to the laptop buttons and the lack of a mouse. Give me time .... My collarless version of the P&S T Shirt Dress:

Tuesday, August 31, 2010
When Life Gives you Lemons ...
I am well on my way with my last challenge assignment. The task was to make a simple dress. Despite having meetings and back to school shopping and starting Monkey Girl on her project, I have managed to get a dress cut out. This is where the lemons come in.
As I have a stash of Sophia knits, I wanted to get through those for easy fall sewing projects. That was why they were bought after all (almost 2 years ago, sigh!). I chose a simple T shirt type dress from Hot Patterns. Yes, I LOVE Trudy's designs. Not all of them are to my personal taste, but she manages to get current trends as well as the classics into her line. The other main reason is that her sloper is NOT Twiggy or a look alike. Her slopers are built on her. She has a shape that is full figured, has hips and a real life bustline! So, there is not much fitting in her lines for somebody like me. So, when I want an easy project I usually pick one ofher patterns.
The pattern is a simple polo style shirt dress with a rugby style hidden button front placket. Easy peasy, right? Warning: here be lemons... As Trudy assumes a level of sewing knowledge and experience, her instructions are very basic. Usually I do not have a problem with this as I have enough time behind my machine that I can figure most things out or research them online if need be. That being said, I have never done a hidden button placket on a center front application that wasn't a shirt. So, a new skill, I thought. I read the instructions briefly and didn't see anything that surprised me and visually I thought I had it made. Then I cut it out and started to assemble. This is where things started to go sour. The pattern calls for you to cut the CF section BEFORE you apply the placket and then flip and stitch. The placket is two pieces and it just didn't lie right. (more details when the project is finished when I do the full review). So, being short on patience and being long on fabric, I cut out a second front piece and then tried to fashion my own placket based on David P. Coffin's CF Placket design, but incorporatingt a hidden placket. The mock up of the ploacket went great, but once it was sewn into the second bodice front, there was too much fabric for it to lie flat. I had done something wrong again. By this time, the CF had been cut to allow the placket insertion and I was out of fabric for a new front.
This is where two nights sleep and many a thought about how I REALLY wanted that dress and how I did NOT want to start completely over led to the lemonade. The front bodice is a single piece. I am using a solid colour. Can I remove the aggravating CF opening portion and insert a coord colour piece to add a design element? I searched the stash and found a basic black that obviusly will go with the basic dark blue of the dress. Then I took some chalk and started to draw lines from the shoulder, extending down around the horrible part. Then I took some black SEAMS GREAT and pinned it in place to get a feel for the lines. Liking what I saw, I grabbes the black and started to pin a length down. The way it was lying, it had a CF cowl shape to it. I kind of like it. I added the self belt to the dress form and am now thinking overnight about it. I always wanted to try draping .... maybe this is an opportunity to ease myself in by draping the cowl! So, I left it pinned for now and will think on it some more. I also want to check out some of the prints I have in the stash. This might be a great way to incorporate some shorter lengths of woven prints to give a "fooler" type look to it. If I have enough, I may even add a faux cuff to the 3/4 length sleeve.
I know there are no pics, but I want to leavethis up to your imaginations! I have taken some, but will leave them for the final pattern review. There is only one review online that I have found, so I am going to post mine when the dress is complete. That reviewer also had some problems with the placket, but she managed to pull it off. So, just as a teaser, here is the pattern: HP 1013 Plain and Simple Iconic Shirtdress and here is the link to that review:Heatherrique Review on Pattern Review.com.
Stay tuned ... I love a challenge and I do have the challenge deadline, plus one more evening meeting and Dino Boy still needs new jeans and sneakers for his first year in Junior High and we are going away for the long weekend. ThinK I can pull it off AND get Monkey Girl's jean jacket cut out? Not unless I live on caffeine and don't sleep! Wait and see what happens this week! any chance of an extension, Darrell??? :)
As I have a stash of Sophia knits, I wanted to get through those for easy fall sewing projects. That was why they were bought after all (almost 2 years ago, sigh!). I chose a simple T shirt type dress from Hot Patterns. Yes, I LOVE Trudy's designs. Not all of them are to my personal taste, but she manages to get current trends as well as the classics into her line. The other main reason is that her sloper is NOT Twiggy or a look alike. Her slopers are built on her. She has a shape that is full figured, has hips and a real life bustline! So, there is not much fitting in her lines for somebody like me. So, when I want an easy project I usually pick one ofher patterns.
The pattern is a simple polo style shirt dress with a rugby style hidden button front placket. Easy peasy, right? Warning: here be lemons... As Trudy assumes a level of sewing knowledge and experience, her instructions are very basic. Usually I do not have a problem with this as I have enough time behind my machine that I can figure most things out or research them online if need be. That being said, I have never done a hidden button placket on a center front application that wasn't a shirt. So, a new skill, I thought. I read the instructions briefly and didn't see anything that surprised me and visually I thought I had it made. Then I cut it out and started to assemble. This is where things started to go sour. The pattern calls for you to cut the CF section BEFORE you apply the placket and then flip and stitch. The placket is two pieces and it just didn't lie right. (more details when the project is finished when I do the full review). So, being short on patience and being long on fabric, I cut out a second front piece and then tried to fashion my own placket based on David P. Coffin's CF Placket design, but incorporatingt a hidden placket. The mock up of the ploacket went great, but once it was sewn into the second bodice front, there was too much fabric for it to lie flat. I had done something wrong again. By this time, the CF had been cut to allow the placket insertion and I was out of fabric for a new front.
This is where two nights sleep and many a thought about how I REALLY wanted that dress and how I did NOT want to start completely over led to the lemonade. The front bodice is a single piece. I am using a solid colour. Can I remove the aggravating CF opening portion and insert a coord colour piece to add a design element? I searched the stash and found a basic black that obviusly will go with the basic dark blue of the dress. Then I took some chalk and started to draw lines from the shoulder, extending down around the horrible part. Then I took some black SEAMS GREAT and pinned it in place to get a feel for the lines. Liking what I saw, I grabbes the black and started to pin a length down. The way it was lying, it had a CF cowl shape to it. I kind of like it. I added the self belt to the dress form and am now thinking overnight about it. I always wanted to try draping .... maybe this is an opportunity to ease myself in by draping the cowl! So, I left it pinned for now and will think on it some more. I also want to check out some of the prints I have in the stash. This might be a great way to incorporate some shorter lengths of woven prints to give a "fooler" type look to it. If I have enough, I may even add a faux cuff to the 3/4 length sleeve.
I know there are no pics, but I want to leavethis up to your imaginations! I have taken some, but will leave them for the final pattern review. There is only one review online that I have found, so I am going to post mine when the dress is complete. That reviewer also had some problems with the placket, but she managed to pull it off. So, just as a teaser, here is the pattern: HP 1013 Plain and Simple Iconic Shirtdress and here is the link to that review:Heatherrique Review on Pattern Review.com.
Stay tuned ... I love a challenge and I do have the challenge deadline, plus one more evening meeting and Dino Boy still needs new jeans and sneakers for his first year in Junior High and we are going away for the long weekend. ThinK I can pull it off AND get Monkey Girl's jean jacket cut out? Not unless I live on caffeine and don't sleep! Wait and see what happens this week! any chance of an extension, Darrell??? :)
Thursday, August 26, 2010
Photos!
So, the first shots are of the pre-challenge garments to show that I actually did sew something! The shots are not the best, but I can't find the tripod and the Pilot is already in bed for the night, so you have just me! SO, remember, the angle is wonky and the lighting not the best ...
First up is a redux of a DKNY shirt that I made into a knit top by leaving off the collar/band and the cuffs. I also shortened the sleeves. The pattern is an OOP Vogue DKNY 2742. It is a loose fitting knot front shirt. By using a smaller size and a knit I was able to use the Rayon knit in the stash quite nicely. I used a slightly lighter thread to have some visual interest in the hems.

Next up is the semi self drafted wrap dress. I used a simple wrap style raglan sleeve top as a basis and then made the fronts a bit narrower. The original pattern has the wrap stitched into the side seams. The fabric is a pure poly silk weight knit bought years ago as part of a Fabricmart bundle. As the neckline is a bit low, I threw together a quick tank from stashed Powerdry that happened to cllosely match the green in the print. The side ties are temporary in brown bamboo.


Now, the homework assignment! I wanted to make a bunch of nice knit tops that weren't T shirts when I bought a bunch of Sophia Knits from Ressy's coop a few years back. It is lovely to sew with ... drapes beautifully, wears so soft and still holds it shape nicely. Good thing I have more left! I mentionned that I had ordered a number of new patterns from my fave indie pattern line, Hot Patterns. I had been waiting for the right time, and August was it! First off the block was a unique loop front view of the basic T. The newer knot/loop combined with the lower necline and the French Dart on the side gives wodnerful shaping! I made the top a little longer in the front to give that shirt shape to it. Because I was shopping the stash, I did not have the match rib knit cuff called for. I used a dark forest type green Sophia knit once again. Here is the link to the pattern: Hot Patterns 3 Graces T shirts. Here is the top:

 The lay of the neckline is not as smooth as I like in the shots, but that is due to me taking the photo and also to the height of the camera for the full body shot. It really focuses on the lower body, so the perspective is off somewhat. I will wear it to Darrell's and he can give his own opinion in person! The unique loop treatment was a bit of a challenge to visualize as the pattern instructions are somewhat sparse (as is normal for HP; they assume a level of ability that allows for that). My spatial sense did not allow me to picture it, but Trudy @ HP always thinks ahead. She has done a number of You Tube videos showing construction and tips for her patterns. Without that video, this could have been a UFO ... I must also add that the pinning of the loop and the darts was made much easier by pinning on the dress form. Laying it on the flat table was a bit troublesome.
So, there you have it! First installation of the actual sewing challenge is done! Tomorrow Monkey girl is going to cut her pattern out (we are using a KS jean jacket) so that will be her first step in her project as well! I am nervous and excited at the same time. I am passing a skill on to my daughter that my mother and dear aunt passed on to me. The challenge of doing it right makes me nervouse, the excitement comes from having something that we can share and that she will use for the rest of her life! Watch out Darrell ... she may only be looking and fondling those samples now, but soon enough she will be buying it! SEE YOU IN A WEEK, DARRELL!!!!
First up is a redux of a DKNY shirt that I made into a knit top by leaving off the collar/band and the cuffs. I also shortened the sleeves. The pattern is an OOP Vogue DKNY 2742. It is a loose fitting knot front shirt. By using a smaller size and a knit I was able to use the Rayon knit in the stash quite nicely. I used a slightly lighter thread to have some visual interest in the hems.

Next up is the semi self drafted wrap dress. I used a simple wrap style raglan sleeve top as a basis and then made the fronts a bit narrower. The original pattern has the wrap stitched into the side seams. The fabric is a pure poly silk weight knit bought years ago as part of a Fabricmart bundle. As the neckline is a bit low, I threw together a quick tank from stashed Powerdry that happened to cllosely match the green in the print. The side ties are temporary in brown bamboo.


Now, the homework assignment! I wanted to make a bunch of nice knit tops that weren't T shirts when I bought a bunch of Sophia Knits from Ressy's coop a few years back. It is lovely to sew with ... drapes beautifully, wears so soft and still holds it shape nicely. Good thing I have more left! I mentionned that I had ordered a number of new patterns from my fave indie pattern line, Hot Patterns. I had been waiting for the right time, and August was it! First off the block was a unique loop front view of the basic T. The newer knot/loop combined with the lower necline and the French Dart on the side gives wodnerful shaping! I made the top a little longer in the front to give that shirt shape to it. Because I was shopping the stash, I did not have the match rib knit cuff called for. I used a dark forest type green Sophia knit once again. Here is the link to the pattern: Hot Patterns 3 Graces T shirts. Here is the top:


So, there you have it! First installation of the actual sewing challenge is done! Tomorrow Monkey girl is going to cut her pattern out (we are using a KS jean jacket) so that will be her first step in her project as well! I am nervous and excited at the same time. I am passing a skill on to my daughter that my mother and dear aunt passed on to me. The challenge of doing it right makes me nervouse, the excitement comes from having something that we can share and that she will use for the rest of her life! Watch out Darrell ... she may only be looking and fondling those samples now, but soon enough she will be buying it! SEE YOU IN A WEEK, DARRELL!!!!
homework update
A quick update on my howmeork! I know I am a couple of days late but I was teaching all day Saturday and the weekend before I was at a company conference for 4 days. When you lose the weekends, you lose a lot of sewing time!
The good news is that I have started and finished a new top. I am going to take pics after the kids are in bed and I have the ability to do quick changes without fear of interuptions! I had ordered new patterns from Hot Patterns and they arrived just in time for this challenge.
Another new toy arrived today as well that will help with getting the posts online! I have been dond extra hours at work for all of August (almost full time hours!) so I rewarded myself with the purchase of a laptop! That means that I no longer have to wait until Dino Boy and Monkey Girl and now the Pilot have all had their turns at the computer. I now have my own! I have spent the evening setting it up with all my software and this is my first non-set up function! What a way to christen it! I can now have it in the sewing room for easy access to video tips and pattern reviews. No more stairs!
So, two tasks down and only one more to go! An sinple dress was the next assignment, I believe. I have two different styles of T shirt dresses, a kimono style wrap dress and then there are the woven patterns to choose from. I think that the stash of Sofia knits and bamboo needs to be dealt with. Since the nights are starting to cool off, would a stylish nightie work as well for the next assignment? I am thinking no. The dress will get done then Monkey girl is keen to start her own back to school sewing. We are going to do a quick jean jacket together on her grandmother's very forgiving old Singer. So, since school starts in 2 weeks, I will get going on those tomorrow night. Tonight is all about the camera!
The good news is that I have started and finished a new top. I am going to take pics after the kids are in bed and I have the ability to do quick changes without fear of interuptions! I had ordered new patterns from Hot Patterns and they arrived just in time for this challenge.
Another new toy arrived today as well that will help with getting the posts online! I have been dond extra hours at work for all of August (almost full time hours!) so I rewarded myself with the purchase of a laptop! That means that I no longer have to wait until Dino Boy and Monkey Girl and now the Pilot have all had their turns at the computer. I now have my own! I have spent the evening setting it up with all my software and this is my first non-set up function! What a way to christen it! I can now have it in the sewing room for easy access to video tips and pattern reviews. No more stairs!
So, two tasks down and only one more to go! An sinple dress was the next assignment, I believe. I have two different styles of T shirt dresses, a kimono style wrap dress and then there are the woven patterns to choose from. I think that the stash of Sofia knits and bamboo needs to be dealt with. Since the nights are starting to cool off, would a stylish nightie work as well for the next assignment? I am thinking no. The dress will get done then Monkey girl is keen to start her own back to school sewing. We are going to do a quick jean jacket together on her grandmother's very forgiving old Singer. So, since school starts in 2 weeks, I will get going on those tomorrow night. Tonight is all about the camera!
Monday, August 09, 2010
One Year Later ...
I was reminded by a dear friend today that it has been over a year since I last sat and shared my projects with the world (so to speak). To me, it seems like so much longer. I wish I could say that I have been madly sewing away and that my wardrobe is overflowing with completed projects that are absolutely divine!
The reason? I wish I could say that I was just too busy but that is not the reason. The past has seen me burn midnight oil many a time as that was the only time avail to me to sew. The truth is that I just didn't want to do it. I had such great hopes for a classy working wardrobe and had invested in some excellent quality fabrics to accomplish that goal. I had the patterns and the storyboard ready to go. Then the work dress code changed, making everything irrelevant. I could not justify sewing up clothes that would not be worn. My logic was, if I sewed them up and kept the work outs going, then I woudl have to spend all that time altering so why not just wait until I needed them and fit them once.
As you may remember from my last post, I work at a women's gym as the Club Administrator. Up until this point last year, I was wearing trousers and nice shoes with a semi fitted yellow cotton blouse (OK, by the time I was done with it, it was tailored to fit me and was not too shabby all things considered!). I had images of pinstriped shirtdresses, tailored pants and jackets, maybe even a vest for winter warmth. Then the new policy came in. The polo shirts are made of a dry fit type fabric in a red with lots of piece work and angles and white accents. I am still supposed to wear dress pants with it and then finish it off with quality sneakers to give the "casual recreational professionsl image". Let me say right up front .... the prospect of wearing sneakers with a pair of trousers made of an Armani wool does not sit well with me! So, all those nice plans went out the window and all that fabric (Armani included) are in stasis. Yes, I have spent the past year basically sulking.
For all the sewing I have done, it took a lot of mental preparation for me to start such a collection of tailored, professional looking clothes. I started with a tailored blazer in a class at my friend, Darrell's. It hangs unfinished (yes, Darrell, it is not finished) in the shop. I initially stopped as the fit changed when I lost weight and then was bulking up in muscle across my back. That affected my sleeve and back fit and then, well, I gave up. Why bother when it would never be worn at work? More sulking ...
Don't despair, though, all is not lost! I started sewing again last month. I made myself a promise that for every UFO I finish, I get to sew something new. First off the table? I finished a knit version of a DKNY knotted top that I have made in the past. This time, instead of leaving the bottom of the bodice open and just overlapped, I changed the pattern somewhat to allow me to stich the CF seam up to the under bustline seam. I shortened the sleeve as it was originally a fall project and then left off the collar and neck band. This lightened the look a bit as well as allowed me to finish it more quickly. One down!
We had a heat wave that had me wishing for summer dresses, so I pulled out a poly knit in a Pucci style print and threw together a semi-self drafted wrap dress. I started with a wrap top that I had made quite a few years ago and then changhed the shape a bit and lengthened it into a dress. I don't yet have the button for the side, so as a temporary measure I have added a wrap belt in a coord colour due to not having enough scraps for a belt. I am not happy with the way the solid belt cuts my silhouette in half (this depsite the fact that I situated the belt as an empire level tie) so I will have to see about finding just the right button for the closure. This is where I discovered that the dress form needs adjusting ... it fit nice and decently on the form, but on me it was a little lower than I liked. So, out came the power dry stash and I threw together a fast tank to go underneath it. I was very lucky to have PD that matched the lighter colour in the print for the time being anyway ...
We had a plumber in to replace the faucet outside in the back of the house last week. When the plumber looked in the ceiling to shut off the water he discovered that the piped were swollen and looked like it had one time almost burst due to freezing. Considering we shut the water off each winter, it had to pre-date our purchase. The Pilot did the only thing he could do ... protect my machines as the pipe was directly over my sewing table!!!! "Move the tables and replace the pipe!" he says. ME? I would have have looked at the tables and said "let it burst, then I can get new machines LOL!" So, now the room is a mess again as we have to put it back together and do some heavy vaccuuming before I sew in there again.
I have to give a very big cyber hug to the dear friend who e-mailed me a sewing intervention today. Knowing I work on deadlines each day and that I thrive on external challenges, this is the gauntlet he threw down:
Well, task one is almost complete. I will say it is done when I have taken and posted pics of the top and dress. As for the project two weeks form now, I saw a top at Mass this week that I am mulling over in my head ... I think I would love to knock it off. It had saddle shoulder lines to it, but the sleeve was more like a very heavily ruched shaped band that went over the shoulder. It was not a full sleeve, but had shaping to it to follow the line of the shoulder. I have an old WOF pattern that I can start with ... but my version has band at the underbust level and maybe a crossover upper bodice. Of course, I will also have to finish a UFO before I can start cutting the top. So, it looks like the bamboo cord jacket will be ready for fall after all! It was originally going to be the rhinestone Riri, but I think I am going to rip the rainbow Riri out of the jacket's original muslin and use that instead. While I am sewing that, I can decide on the fabric for the top. Will it be bamboo knit or a Sophia knit? Both are in the stash ... Blue, green or teal? Burgundy is too dark yet for this time of year, I think.
What say you all?
The reason? I wish I could say that I was just too busy but that is not the reason. The past has seen me burn midnight oil many a time as that was the only time avail to me to sew. The truth is that I just didn't want to do it. I had such great hopes for a classy working wardrobe and had invested in some excellent quality fabrics to accomplish that goal. I had the patterns and the storyboard ready to go. Then the work dress code changed, making everything irrelevant. I could not justify sewing up clothes that would not be worn. My logic was, if I sewed them up and kept the work outs going, then I woudl have to spend all that time altering so why not just wait until I needed them and fit them once.
As you may remember from my last post, I work at a women's gym as the Club Administrator. Up until this point last year, I was wearing trousers and nice shoes with a semi fitted yellow cotton blouse (OK, by the time I was done with it, it was tailored to fit me and was not too shabby all things considered!). I had images of pinstriped shirtdresses, tailored pants and jackets, maybe even a vest for winter warmth. Then the new policy came in. The polo shirts are made of a dry fit type fabric in a red with lots of piece work and angles and white accents. I am still supposed to wear dress pants with it and then finish it off with quality sneakers to give the "casual recreational professionsl image". Let me say right up front .... the prospect of wearing sneakers with a pair of trousers made of an Armani wool does not sit well with me! So, all those nice plans went out the window and all that fabric (Armani included) are in stasis. Yes, I have spent the past year basically sulking.
For all the sewing I have done, it took a lot of mental preparation for me to start such a collection of tailored, professional looking clothes. I started with a tailored blazer in a class at my friend, Darrell's. It hangs unfinished (yes, Darrell, it is not finished) in the shop. I initially stopped as the fit changed when I lost weight and then was bulking up in muscle across my back. That affected my sleeve and back fit and then, well, I gave up. Why bother when it would never be worn at work? More sulking ...
Don't despair, though, all is not lost! I started sewing again last month. I made myself a promise that for every UFO I finish, I get to sew something new. First off the table? I finished a knit version of a DKNY knotted top that I have made in the past. This time, instead of leaving the bottom of the bodice open and just overlapped, I changed the pattern somewhat to allow me to stich the CF seam up to the under bustline seam. I shortened the sleeve as it was originally a fall project and then left off the collar and neck band. This lightened the look a bit as well as allowed me to finish it more quickly. One down!
We had a heat wave that had me wishing for summer dresses, so I pulled out a poly knit in a Pucci style print and threw together a semi-self drafted wrap dress. I started with a wrap top that I had made quite a few years ago and then changhed the shape a bit and lengthened it into a dress. I don't yet have the button for the side, so as a temporary measure I have added a wrap belt in a coord colour due to not having enough scraps for a belt. I am not happy with the way the solid belt cuts my silhouette in half (this depsite the fact that I situated the belt as an empire level tie) so I will have to see about finding just the right button for the closure. This is where I discovered that the dress form needs adjusting ... it fit nice and decently on the form, but on me it was a little lower than I liked. So, out came the power dry stash and I threw together a fast tank to go underneath it. I was very lucky to have PD that matched the lighter colour in the print for the time being anyway ...
We had a plumber in to replace the faucet outside in the back of the house last week. When the plumber looked in the ceiling to shut off the water he discovered that the piped were swollen and looked like it had one time almost burst due to freezing. Considering we shut the water off each winter, it had to pre-date our purchase. The Pilot did the only thing he could do ... protect my machines as the pipe was directly over my sewing table!!!! "Move the tables and replace the pipe!" he says. ME? I would have have looked at the tables and said "let it burst, then I can get new machines LOL!" So, now the room is a mess again as we have to put it back together and do some heavy vaccuuming before I sew in there again.
I have to give a very big cyber hug to the dear friend who e-mailed me a sewing intervention today. Knowing I work on deadlines each day and that I thrive on external challenges, this is the gauntlet he threw down:
You have 7 days to make an update to your blog
You have 14 days to make yourself a simple skirt or top
You have 30 days to make yourself a dress.
Well, task one is almost complete. I will say it is done when I have taken and posted pics of the top and dress. As for the project two weeks form now, I saw a top at Mass this week that I am mulling over in my head ... I think I would love to knock it off. It had saddle shoulder lines to it, but the sleeve was more like a very heavily ruched shaped band that went over the shoulder. It was not a full sleeve, but had shaping to it to follow the line of the shoulder. I have an old WOF pattern that I can start with ... but my version has band at the underbust level and maybe a crossover upper bodice. Of course, I will also have to finish a UFO before I can start cutting the top. So, it looks like the bamboo cord jacket will be ready for fall after all! It was originally going to be the rhinestone Riri, but I think I am going to rip the rainbow Riri out of the jacket's original muslin and use that instead. While I am sewing that, I can decide on the fabric for the top. Will it be bamboo knit or a Sophia knit? Both are in the stash ... Blue, green or teal? Burgundy is too dark yet for this time of year, I think.
What say you all?
Monday, July 13, 2009
Rethinking workwear
For those of you who have been wodnering where I have been I can safely say I have not been sewing. I have been lurking and reading and trying to avoid buying patterns and fabrics as I had the plan to finish the work wardrobe this summer. I work at a ladies gym as the club administrator, and have a mandatory top I Have to wear along with black, none fitness wear bottoms of my choice. The top was a choice of a polo shirt in white or black (w/company logo) or a yellow button shirt with darting on the front and shaped sideseams along with the same bottoms. I had stalled in the sewing as word leaked out of new uniforms being on the way. Well, they are now here. I can't post a photo as they have yet to come into my possession, but that will happen next week.
The original plan was to make up a skirt suit out of a black wool w/white pinstripe and then a shirtdress out of a black wool with a blue pinstripe for that Nautica look when combined with the yellow shirt. The goal was to make basic black not boring. So, I chose my fabric very carefully. I have an Armani wool that I was going to tailor into a wonderful pair of trousers now that I have made the HP into a TNT for me. THese are all going to have to be rethought as the new design is a raglan sleeved polo shirt with some shaping (according to the photo, anyway ... stay tune for that!). The colour is a red, but it looks to be a blue toned red so far with white accents at the seam lines. That won't do for the shirtdress or the business suit. They are dressing me down and I am not sure that I like it!
So, I have a HP Sportive Skirt suit already half done in bamboo cord that will fit the bill. The skirt is done already, lined with a remnant of silk bought for a steal at Darrell's and the matching jacket is cut and ready to go under the machine. The delay has been due to a window repair that required the computer to be relocated into the Shop as it had the only phone jack for the DSL connection. So, now that the computer is back, I have yet to set the room to rights. (I did find an old cross stitch that has been aging in the closet though ... I pulled that out and have been playing away at that again!) I have a pair of the Razor Sharps in a cashmere wool for the winter that is divine to wear! As I haven't pressed the crease in, they can be dressed down a bit.
So, all you wardrobe mavens ... how do I rework this new wardrobe to accomodate the polo shirts? Patterns already on hand and fitted include the HP Razor Sharps, the HP Sportive Skirt Suit, the Chilled Out Sweat suit and the Skinny Jeans (which aren't so skinny at my size range!); I have a DKNY pant that I have never tried but is cut out that has seamlines in the front and back that could be sharp yet casual. But would they look good in the wool? I seem to have blinders on that all I can see for these fabrics are business clothes! I need pattern suggestions please!
Fabric list: wool (tropical weight) w/white pinstripes
wool w/cashmere w/blue pinstripes
wool (midweight) with a herringbone pattern woven in
rayon linen (very lightweight)
bamboo knit
Sophia knit
I am going to have to finish that jacket and then I figure I can start on the new special project. In the spring was the First Communion Dress, two years ago it was the Cocktail Dress that was my incarnation of the HP BOllywood for the Pilot's Grad dinner. Now, I am going to work on a dress for me again! My company holds it's annual conference each year in the summer. The weekend ends in an invite only event knwon as "Top 500". It is for the top sales people in the company and for select others that have been nominated by their home clubs. Not being a sales person, my GM nominated me to go. The big finale of the event is a Hawaiian boat cruise on Lake Ontario. Thanks to MaryBeth, I now have seen the Decades of Style pattern line and fell in love with this dress pattern ... it is a 1940's wrap sundress that I have to have!!!! In the right print this could be nice Hawaiian as opposed the probably prolific tacky style that will prevail on the cruise!

I may have to play with the back a bit if I can't find a bra to go with it, but that won't be a problem. I've already warned Darrell that I need the right fabric and he is waiting with a "classic linen print" for me. Can't wait to see what it is like! I never have issues with his choices! If I do get the linen, then I may just enter this into the Threads Linen Challenge! I am thinking of trying a French seam or a Hong Kong finish or some other treatment I have never tried. Why not push my limits a bit more, right?
So I await eagerly the wardrobe advice, ladies! Maybe later we can talk about the shoes already residing in the Closet to supplement this wardrobe in the making ...
The original plan was to make up a skirt suit out of a black wool w/white pinstripe and then a shirtdress out of a black wool with a blue pinstripe for that Nautica look when combined with the yellow shirt. The goal was to make basic black not boring. So, I chose my fabric very carefully. I have an Armani wool that I was going to tailor into a wonderful pair of trousers now that I have made the HP into a TNT for me. THese are all going to have to be rethought as the new design is a raglan sleeved polo shirt with some shaping (according to the photo, anyway ... stay tune for that!). The colour is a red, but it looks to be a blue toned red so far with white accents at the seam lines. That won't do for the shirtdress or the business suit. They are dressing me down and I am not sure that I like it!
So, I have a HP Sportive Skirt suit already half done in bamboo cord that will fit the bill. The skirt is done already, lined with a remnant of silk bought for a steal at Darrell's and the matching jacket is cut and ready to go under the machine. The delay has been due to a window repair that required the computer to be relocated into the Shop as it had the only phone jack for the DSL connection. So, now that the computer is back, I have yet to set the room to rights. (I did find an old cross stitch that has been aging in the closet though ... I pulled that out and have been playing away at that again!) I have a pair of the Razor Sharps in a cashmere wool for the winter that is divine to wear! As I haven't pressed the crease in, they can be dressed down a bit.
So, all you wardrobe mavens ... how do I rework this new wardrobe to accomodate the polo shirts? Patterns already on hand and fitted include the HP Razor Sharps, the HP Sportive Skirt Suit, the Chilled Out Sweat suit and the Skinny Jeans (which aren't so skinny at my size range!); I have a DKNY pant that I have never tried but is cut out that has seamlines in the front and back that could be sharp yet casual. But would they look good in the wool? I seem to have blinders on that all I can see for these fabrics are business clothes! I need pattern suggestions please!
Fabric list: wool (tropical weight) w/white pinstripes
wool w/cashmere w/blue pinstripes
wool (midweight) with a herringbone pattern woven in
rayon linen (very lightweight)
bamboo knit
Sophia knit
I am going to have to finish that jacket and then I figure I can start on the new special project. In the spring was the First Communion Dress, two years ago it was the Cocktail Dress that was my incarnation of the HP BOllywood for the Pilot's Grad dinner. Now, I am going to work on a dress for me again! My company holds it's annual conference each year in the summer. The weekend ends in an invite only event knwon as "Top 500". It is for the top sales people in the company and for select others that have been nominated by their home clubs. Not being a sales person, my GM nominated me to go. The big finale of the event is a Hawaiian boat cruise on Lake Ontario. Thanks to MaryBeth, I now have seen the Decades of Style pattern line and fell in love with this dress pattern ... it is a 1940's wrap sundress that I have to have!!!! In the right print this could be nice Hawaiian as opposed the probably prolific tacky style that will prevail on the cruise!

I may have to play with the back a bit if I can't find a bra to go with it, but that won't be a problem. I've already warned Darrell that I need the right fabric and he is waiting with a "classic linen print" for me. Can't wait to see what it is like! I never have issues with his choices! If I do get the linen, then I may just enter this into the Threads Linen Challenge! I am thinking of trying a French seam or a Hong Kong finish or some other treatment I have never tried. Why not push my limits a bit more, right?
So I await eagerly the wardrobe advice, ladies! Maybe later we can talk about the shoes already residing in the Closet to supplement this wardrobe in the making ...

Saturday, April 25, 2009
Promised Pics ...

For those who have mastered the art of patience, you are about to be rewarded ... thanks to the efforst of the Pilot, the Easter dress and Confirmation Dress photos are done and on the hard drive, so here they are! I made the same dress for each occasion, with minor changes (by request) to the sleeve design and the neckline. The floral Easter version came first and was made directly out of the envelope. I used a thin stretch cotton with a lining of yellow cotton. She likes the belt tied in front rather than the back here. The belt is meant to tie in the back but is actually long enough to wrap around the front once and then tie in back. It made for sitting through the Mass a bit uncomfortable, though, so she tied it in front.
The sleeves are way too full (she likened them to wings) and even if they were made in the chiffon asked for, I think it would be too much on her frame, so for the next version, I converted them into what I call a tulip sleeve (please correct me if I am wrong when you see the photos below). I also didn't like the way the bodice gaped at the neckline in the square shape, so I rounded it off for her. It then fit much better, but I think that if I were to do the square version again, I would have to dart out some of the neckline as the chest area fits well on her as she is a bit broad across the chest and back.
For the Communion version, I took my little fashionista to see Darrell at his shop to pick out fabric. I was thinking a nice cotton for comfort and ease, but then after talking to Denise (Darrell's wonderful assistant who happens to run her own kids label on diplay and sale at Darrell's now!), we decided on a silk dupioni skirt with a beaded silk bodice to match. Although initially against the thought of a one occassion dress, I then decided that it was time that I added to the garment history in the family. There are Baptism gowns on both sides already, but the only First Communion pieces are the headpiece and veil and purse that my sister's all wore. The head piece is now fitted to a bridal veil from my wedding, so we didn't want to take that apart, so I had nothing for my daughter to wear. So, I showed the silk to Hamster Girl and she was smitten (she loves the feel of fine fabrics and adores Darrell's shop just because of the rack of silk samples she fondles for hours on end!). Away we went home with a family piece in the making!
There were two time consuming issues with this dress: the beads and cleaning the sewing room. The sewing room needed to be purged of black lint. You see, for the past two weeks I had been sewing all black ... the cashmere wool pants, the Windbloc raincoat and the Bamboo cord Sportive skirt suit were all done in black. The cutting table and the machines all needed to be cleared before the antique white silk went anywhere near the room! The next hardest part of this dress was removing the beads from the seam allowances and to give room for the presser foot to move. Smashing each bead was preferred to the easier method of snipping the thread as that allows beads further down the thread to come off, so out came the small sewing hammer! I wrapped the head in some scrap cotton so that there was no chance at marking up the fabric. Then I was good to go!
 There were many mini bridal gowns worn by her classmates (complete with veils and tiaras), but I think that this simple dress and her headband suited her much better. She loved the dress and I think it is a classic style that can be handed down to her daughter and maybe even Dino Boy's one day. This time, the ties were shortened so that one wrap in front and they were fine to tie in the back. As this dress is supposed to be mid calf length, the original ties would be very porportional if the length was not shortened as it was here. My daughter is quite the young lady when the time calls for it, but she is still very tomboyish at heart, so full length was not an option at all for her!
 Here is a shot of the two of them, he counting the hours till his birthday while he sat and watched all the little "kids", mumbling about being bored when not serving on the altar! I am proud of how he let her have her day and didn't spend it all talkign about close his big day was!
Saturday, April 18, 2009
Time Flies ...
Time is flying so fast here at Newman's Needle! It seems like only last week that I posted and promised pant photos. Since then, I have finished the cashemere wool pants, made a rain jacket for Dino Boy and then a dress for Hamster Girl for Easter (really a wearable muslin for her First Communion dress). I have managed also to alter a work shirt to fit much better only to have to tweak it a bit more. The photos are still AWOL. I find I am making more time to sew and to read my blog friends works, but not returning the favour by posting my own. Now that I am back in the sewinng world again, I am going to work more on posting as well.
I just got caught up over at Couturesmith where Connie is working on yet another wedding gown for her daughter's upcoming event. I smiled as she spoke about the mundane hand work and the inevitable rip stitching that comes with the end of a project. Today I spent in the work shop cutting and sewing and doing my fiar share of rip stitching as I worked with the beaded silk that makes up the bodice of Hamster Girl's First Communion Dress.
The sleeves in the original did not meet her desires as they were too wing like for her taste. So, the very full sleeve became an overlapped tulip sleep with a gathered cap. The ties were put in backwards (lining up) to the original as she likes it to wrap in front then tie in back. The beads needed removing in the seam allowances and the seamline (+1/4") to allow for a flat sewing surface. There were issues with the sleeve redesign that had me ripping the serged finish (lucky for me I don't trim the s.a. off when edge finishing at the start!) and that took a while.
All through the frustrations I kept breathing deeply. For like Connie's many wedding dresses, this is a memory project. My daughter's First Communion is tomorrow, you see, and I wanted to add a piece ot the family collection of special pieces. Both sides of the family have a baptism gown that has been handed down. There is a baby quilt made for me by my grand mother that is a constant companion to Hamster Girl in her bedroom. The head piefce that held the veils for my 3 sisters way back on their First Communion was worn for my wedding. All these memories. All these special sewing projects that have been handed down to me. This is my chance to continue the pattern and to hand something down to my children. So, no cotton for this dress. This one is beaded silk bodice with a dupioni skirt. This will be stored with my wedding dress for the future. I am pretty sure that she will be too tall for my dress, but I am sure that I can alter it to make something special for her wedding out of it.
Tomorrow my little girl walks up the aisle in her little white dress. Soon enough the time will come when she ias asking for her prom dress, then soon enough after that the "Big" white dress ... time flies. Time to take photos to freeze these moments! Tomorrow there will be lots of photos taken as she wears both dresses for her Nanna and Poppa and her Auntie who are here to share this special time. Maybe I can finish a skirt while I am at it for myself for tomorrow ... all I need to do is construct the lining and hem it. Doable before 1:00 pm???? Stay tuned!
I just got caught up over at Couturesmith where Connie is working on yet another wedding gown for her daughter's upcoming event. I smiled as she spoke about the mundane hand work and the inevitable rip stitching that comes with the end of a project. Today I spent in the work shop cutting and sewing and doing my fiar share of rip stitching as I worked with the beaded silk that makes up the bodice of Hamster Girl's First Communion Dress.
The sleeves in the original did not meet her desires as they were too wing like for her taste. So, the very full sleeve became an overlapped tulip sleep with a gathered cap. The ties were put in backwards (lining up) to the original as she likes it to wrap in front then tie in back. The beads needed removing in the seam allowances and the seamline (+1/4") to allow for a flat sewing surface. There were issues with the sleeve redesign that had me ripping the serged finish (lucky for me I don't trim the s.a. off when edge finishing at the start!) and that took a while.
All through the frustrations I kept breathing deeply. For like Connie's many wedding dresses, this is a memory project. My daughter's First Communion is tomorrow, you see, and I wanted to add a piece ot the family collection of special pieces. Both sides of the family have a baptism gown that has been handed down. There is a baby quilt made for me by my grand mother that is a constant companion to Hamster Girl in her bedroom. The head piefce that held the veils for my 3 sisters way back on their First Communion was worn for my wedding. All these memories. All these special sewing projects that have been handed down to me. This is my chance to continue the pattern and to hand something down to my children. So, no cotton for this dress. This one is beaded silk bodice with a dupioni skirt. This will be stored with my wedding dress for the future. I am pretty sure that she will be too tall for my dress, but I am sure that I can alter it to make something special for her wedding out of it.
Tomorrow my little girl walks up the aisle in her little white dress. Soon enough the time will come when she ias asking for her prom dress, then soon enough after that the "Big" white dress ... time flies. Time to take photos to freeze these moments! Tomorrow there will be lots of photos taken as she wears both dresses for her Nanna and Poppa and her Auntie who are here to share this special time. Maybe I can finish a skirt while I am at it for myself for tomorrow ... all I need to do is construct the lining and hem it. Doable before 1:00 pm???? Stay tuned!
Sunday, November 30, 2008
Pants Pizazz!
I took a big step last week-end ... I cut out a pair of pants in a brown wool that has aged nicely in the stash for 2 years. Why the nerves over something I have successfully cut and fitted before? Because of the new fit. You see, I have been working with a trainer at work for the past six months (if you count the almost 5 weeks we were "paused" due to vacation and work load) and as a result, I have lost some inches. I was not sure how much this would matter until the Liz Claiborn pants I had purchased last fall began to actually fall off! So, I took a deep breath and decided that I would take a risk and go down a whole size on the pattern.
I pulled out the HP Razor Sharp pants pattern and cut out a size 14. Something I haven't done on pants since my early years of sewing (and those didn't even fit right!). Rather than make up muslin, I pulled out the brown wool and just went at it! I cut it out as a 14 as is with out any additions to the s.a. at all. When sewing, I did hedge and only use 3/8" s.a. on the s.s and the inseam, however, I did use the full 5/8" at CB&CF. I also did my standard curve adjustment (I lower the J into more of an L) as that is something that is standard for my figure. By eliminating the darts at the front and back, I have that little bit of ease that I need at the waist.
I gave them a quick try on a minute ago and held my breath while I turned into my corner mirrors ... WAHOOO!!!! IT WORKED!!!! The back looks AMAZING! I now have quite the nice butt in these pants! So, now all I have to do is to cut out the silk organza that I want to use as a lining and I will have a new pair of trousers for parent teacher night at the end of the week. The even better news is that now I can breathe easier and cut out another pair in the cashmere wool (lined again with the silk organza) as I now am certain of the fit!
I would show photos but I need to get to bed as we are expecting snow and freezing rain over night, so I will have to shovel in the morning. That means getting up early ...
This will really motivate me to continue on with the training as I definitely see a difference in the body shape even if the pounds are not dropping much! Who needs scales when you have a measuring tape???
I will post back tomorrow night after I come back from the Beaver meeting with Monkey Girl and have the lining cut out. Then I may have a photo to share as well. I will start to draft my review of the pattern as I go, but that will be posted much later in the week.
I pulled out the HP Razor Sharp pants pattern and cut out a size 14. Something I haven't done on pants since my early years of sewing (and those didn't even fit right!). Rather than make up muslin, I pulled out the brown wool and just went at it! I cut it out as a 14 as is with out any additions to the s.a. at all. When sewing, I did hedge and only use 3/8" s.a. on the s.s and the inseam, however, I did use the full 5/8" at CB&CF. I also did my standard curve adjustment (I lower the J into more of an L) as that is something that is standard for my figure. By eliminating the darts at the front and back, I have that little bit of ease that I need at the waist.
I gave them a quick try on a minute ago and held my breath while I turned into my corner mirrors ... WAHOOO!!!! IT WORKED!!!! The back looks AMAZING! I now have quite the nice butt in these pants! So, now all I have to do is to cut out the silk organza that I want to use as a lining and I will have a new pair of trousers for parent teacher night at the end of the week. The even better news is that now I can breathe easier and cut out another pair in the cashmere wool (lined again with the silk organza) as I now am certain of the fit!
I would show photos but I need to get to bed as we are expecting snow and freezing rain over night, so I will have to shovel in the morning. That means getting up early ...
This will really motivate me to continue on with the training as I definitely see a difference in the body shape even if the pounds are not dropping much! Who needs scales when you have a measuring tape???
I will post back tomorrow night after I come back from the Beaver meeting with Monkey Girl and have the lining cut out. Then I may have a photo to share as well. I will start to draft my review of the pattern as I go, but that will be posted much later in the week.
Friday, November 07, 2008
Update from the prodigal sewer ...
Hello all! I am considering renaming the Needle the Prodigal Sewer as I have been so busy that I have been neglecting the machines. In return for this extended vacation, they have nicely managed to pull lots of fluff bunnies out of thin air and leave them around the carpet. The Pattern pile has grown (Thanks, Trudy and Jeremy!) a bit as has the pile of new luscious fabrics on hand (thanks to Darrell and Ressy!). So, in an attempt to refocus my energies on something other than Scout neck scarves (a record 45 were sewn and I have 15 more to go by Monday - argh!), I want to reorg the work shop. I wanted to start last weekend but it was plastic week not paper on our recycle run. As I don't have the space in the Pilot's shop (otherwise known as the GARAGE) for that much paper (loads of scraps of paper and patterns that I really won't sew again), I waited until this weekend ... then I can start sewing in earnest!
Rather than focus on the patterns, I am going to list the fabrics and muse about the choices available to them. Maybe they will tell me which they prefer (assuming they forgive me for ignoring them). Maybe I will actually have to make a decision on my own ... sigh.
This fall I am focussing on quality fabrics for work. I figure it is an investment, so why scrimp? The only limit for work is that it must be black. No choice ... I do get a "nice" buttercup yellow shirt to wear with it, though. Too bad it is designed poorly! I have a wool suiting with a white pin stripe. That is spoken for as a Marfy pencil skirt with a back bias godet and a matching blazer. Then there is the black wool/cashmere herringbone that will either become a sleeveless wrap dress or an almost tunic length vest. The medium weight would be welcome in the winter air conditioning of the gym! The pinnacle of the pile is another cashmere wool (yup! there is a trend to my shopping these days! I am determined that basic black will not be boring at my gym!). This one is a black with a royal blue pinstripe to it. This one is screaming at me to become a princess sheath style dress that I can wear with my nice yellow ... Darrell says it would be a very "Nautica" look. THEN there is the long lengths of the Rayon Linen that I bought from Ressy last year that could also be used up for now. I see a nice looser fitting twist shirt that will go over the yellow nicely out of that. Then there is the black RPL as well that keeps fighting to the top of the pile of RPL in a box on the floor.
The navy pinstripe is screaming the loudest, but I can't bring myself to cut it first. The commotion the other fabrics will make would be unbearable! So, my thought is to pull off the twist top first out of the rayon linen and then head on over to something else! I could use some more trousers, but I think that this weave will pill at the crotch line and I don't want that. Maybe a jumper type dress?
One very important thing I do have to do before I start anything new is to re-measure myself. For the past 5 months I have been working with a trainer twice a week (OK, trying to make it twice a week, not always successful!) and have managed to dorp some more inches. Just this morning, I pulled on a tank top at the gym proshop and bought it. The clincher? It was a size MEDIUM!!! And it FIT!!!! I am now down a size on the rack so I have to see what that equates to (if anything) on the machine!
Oh, and I almost forgot ... I finally finished the HP Cheery Blossom coat from way last year! The temps got cold last week and I needed something for work, so I moved the buttons over towards the sideseam a bit and then hemmed it. I did a rush job on the sleeve hems, so I need to rip and redo it as it is not a nice as I like. I kept the lining and interlining hanging loose so it needs a bit of a trim at one or two places as well. I removed the pockets and am going to use that fabric for belt loops for the belt. I am certain that I will lose that belt without it loops or it being stitched on somehow (maybe with extra buttons in the back?). I will provide pics when the final touches are done.
I wish I was as prolific as my friend Julia over at her blog. She does such a wonderful job at her sewing and her writing and posting that I often feel jealous!
The Pilot just came home, so we are now off to see Madagasacar 2! Time spent laughing with the family is priceless!
Rather than focus on the patterns, I am going to list the fabrics and muse about the choices available to them. Maybe they will tell me which they prefer (assuming they forgive me for ignoring them). Maybe I will actually have to make a decision on my own ... sigh.
This fall I am focussing on quality fabrics for work. I figure it is an investment, so why scrimp? The only limit for work is that it must be black. No choice ... I do get a "nice" buttercup yellow shirt to wear with it, though. Too bad it is designed poorly! I have a wool suiting with a white pin stripe. That is spoken for as a Marfy pencil skirt with a back bias godet and a matching blazer. Then there is the black wool/cashmere herringbone that will either become a sleeveless wrap dress or an almost tunic length vest. The medium weight would be welcome in the winter air conditioning of the gym! The pinnacle of the pile is another cashmere wool (yup! there is a trend to my shopping these days! I am determined that basic black will not be boring at my gym!). This one is a black with a royal blue pinstripe to it. This one is screaming at me to become a princess sheath style dress that I can wear with my nice yellow ... Darrell says it would be a very "Nautica" look. THEN there is the long lengths of the Rayon Linen that I bought from Ressy last year that could also be used up for now. I see a nice looser fitting twist shirt that will go over the yellow nicely out of that. Then there is the black RPL as well that keeps fighting to the top of the pile of RPL in a box on the floor.
The navy pinstripe is screaming the loudest, but I can't bring myself to cut it first. The commotion the other fabrics will make would be unbearable! So, my thought is to pull off the twist top first out of the rayon linen and then head on over to something else! I could use some more trousers, but I think that this weave will pill at the crotch line and I don't want that. Maybe a jumper type dress?
One very important thing I do have to do before I start anything new is to re-measure myself. For the past 5 months I have been working with a trainer twice a week (OK, trying to make it twice a week, not always successful!) and have managed to dorp some more inches. Just this morning, I pulled on a tank top at the gym proshop and bought it. The clincher? It was a size MEDIUM!!! And it FIT!!!! I am now down a size on the rack so I have to see what that equates to (if anything) on the machine!
Oh, and I almost forgot ... I finally finished the HP Cheery Blossom coat from way last year! The temps got cold last week and I needed something for work, so I moved the buttons over towards the sideseam a bit and then hemmed it. I did a rush job on the sleeve hems, so I need to rip and redo it as it is not a nice as I like. I kept the lining and interlining hanging loose so it needs a bit of a trim at one or two places as well. I removed the pockets and am going to use that fabric for belt loops for the belt. I am certain that I will lose that belt without it loops or it being stitched on somehow (maybe with extra buttons in the back?). I will provide pics when the final touches are done.
I wish I was as prolific as my friend Julia over at her blog. She does such a wonderful job at her sewing and her writing and posting that I often feel jealous!
The Pilot just came home, so we are now off to see Madagasacar 2! Time spent laughing with the family is priceless!
Wednesday, September 03, 2008
padding
During my morning read of the online local paper, I found this little gem about how my country's bureaucrats are trying to have those "wonderful" labels found on mattresses, pillows, sofas, etc. added to (get ready for the laugh, so put your cups down!) padded BRAS, shoulder pads and other various items. Yup, I kid you not ... read on ...
Don't we have other things to worry about?
Tempest in a D cup: Garment makers cry foul over padding rules
Cassandra Drudi
The Ottawa Citizen
Wednesday, September 03, 2008
OTTAWA - Canadian garment manufacturers are seething over changes to Ontario regulations governing upholstered and stuffed articles that would see such items as bras and shoulder pads treated the same as mattresses and comforters.
These businesses have one message for the government -- stuff your rules.
"There's nowhere in the world that this exists -- in the world," said Elliot Lifson, president of the Canadian Apparel Federation, an Ottawa-based association that represents hundreds of companies within the garment industry.
The Ontario Upholstered and Stuffed Articles Regulation, which is enforced by the provincial Technical Standards and Safety Authority, requires that "all upholstered and stuffed articles offered for sale in Ontario must bear a label in the prescribed format."
The regulation aims to "protect the public from the use of unclean or used fillings."
But the safety authority has failed to make clear what the health concerns regarding shoulder pads -- which don't usually come directly into contact with the body -- are, Mr. Lifson said.
"I don't know where the risk is," said Mr. Lifson, who is also the vice-chairman of Montreal-based Peerless Clothing, a tailored menswear producer. "Where's the relation to safety?"
It's a good question, said Dr. Jason Rivers, a clinical professor of dermatology at the University of British Columbia and a practising dermatologist in Vancouver.
"There should really be no issues with this. The padded material's usually sealed in, anyway," he said, adding that in "20-odd" years of dermatology practice, he's never encountered patients with bra- or shoulder-pad-related problems.
Under the changes, which come into effect next year, bras and shoulder pads must be affixed with 2.5-centimetre-by-seven-centimetre labels, similar to those required on stuffed toys, that state the items are filled with "new material only."
Producers of padded items will have to register with the safety authority and pay an annual registration fee: $400 for manufacturers and $20 for hobbyists and crafters who work from home.
"All padded undergarments and those involved in their manufacture, importation, distribution or retailing" are expected to comply, the safety authority regulations state.
It's all a bit much for people in the industry.
"Why should we have to have a registry of the manufacturers of padded undergarments?" asked Bob Kirke, executive director of the apparel federation.
Dara Vorkapic, the safety authority's pointwoman on the regulations, was not available for comment yesterday.
In the document advising of the regulatory changes on the authority's website, Ms. Vorkapic said that the safety authority is "continually creating greater ways to serve public safety, and protect consumers against unsafe materials."
Chris Piper, an associate professor of operations at the University of Western Ontario's Richard Ivey School of Business, said changing safety regulations are not uncommon. "It's the cost of doing business," he said. "I don't see it as a particularly unique or unusual event."
But importers may encounter problems complying with the regulations, since factories abroad typically produce garments for more than the Ontario market, he said.
Members of the Canadian Apparel Federation hope to meet with the safety authority's upholstered and stuffed articles arm to discuss the changes.
"I hope common sense will prevail," Mr. Lifson said.
© The Ottawa Citizen 2008
Don't we have other things to worry about?
Friday, July 25, 2008
PD project photos
First off I apologize for the quality and angle of the shots. The tripod seems to have acquired the ability to leave the workshop unaided, so the nightie shots are not the most flattering of me ... they make my head look so tiny compared to everything else! Once we get back from the vacation I will re-shoot with the tripod (or take over the kids' bathroom for re-takes as it has the best light!
So, without further excuses, here they are

This is another one of my TNT princess T's made in a Nomex Power Dry with silkweight PD piping and neck band. Note to self, when using PD for neckbands, don't just fold and stitch. Use a two piece band so that you have two layers of the wicking surface on top of each other. That way the wicking surface is against the skin. Trust me, when you are working out, if the neck sticks to you, you ARE NOT comfortable!
Next up, a new version of the HP Cadeaux T. I love this pattern and not just because of it having been free! This one is in a poly/lycra knit. I love the print as it is takes me through all seasons thanks to the green and ivory in it! I added some fullness at the CF of the neckline to give some gathering interest.

The next top is made with some beautiful stretch cotton lace underlined with PD. Yup, I am heading to the Pacific coast for 2 weeks, so I need that PD! The first one is a version of a Palmer Pletsch pattern where I decided I wanted to leave off the sleeves. The armscye was a little low, so I added elastic to the seamline to pull it in a bit.
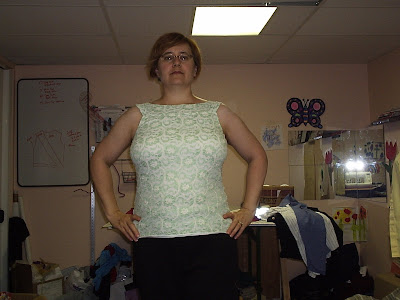
Last but not least, here is one of the two nighties I made up, again using PD. They are from a custom colour run from Ressy last year. The pattern is a vintage one that I bought from Lanetz Living, a wonderful little webstore with plenty of nice surprises hiding in there! I wanted to have something feminine but not frou frou and still be slightly sexy. So, I chose view C.
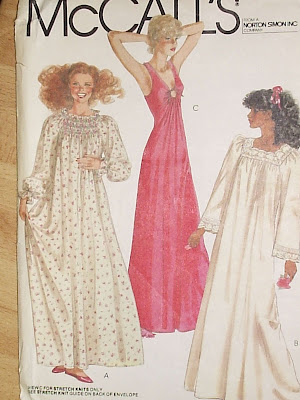 The first version eliminated the tie opening as I will be staying at the DMIL's house for the next week! So, I simply filled in the void from the opening and then gathered it all in. I love the fit of the skirt! The second one (for home use only) has the tie opening and is in a nice dark raspberry pink. It fits a bit more snug without the extra fabric at CF, but it fills the bill as a "birthday present" for the Pilot!

That is all for now ... I have to go do that last minute laundry and get the kids packed (not to mention me and the Pilot), book the cab for tomorrow, oh yeah and finish adding neck bands to Monkey Boy's T's ... do you think I can squeeze in another simple T for myself? grin ... you never know! I am in the groove to be sure!
So, without further excuses, here they are

This is another one of my TNT princess T's made in a Nomex Power Dry with silkweight PD piping and neck band. Note to self, when using PD for neckbands, don't just fold and stitch. Use a two piece band so that you have two layers of the wicking surface on top of each other. That way the wicking surface is against the skin. Trust me, when you are working out, if the neck sticks to you, you ARE NOT comfortable!
Next up, a new version of the HP Cadeaux T. I love this pattern and not just because of it having been free! This one is in a poly/lycra knit. I love the print as it is takes me through all seasons thanks to the green and ivory in it! I added some fullness at the CF of the neckline to give some gathering interest.

The next top is made with some beautiful stretch cotton lace underlined with PD. Yup, I am heading to the Pacific coast for 2 weeks, so I need that PD! The first one is a version of a Palmer Pletsch pattern where I decided I wanted to leave off the sleeves. The armscye was a little low, so I added elastic to the seamline to pull it in a bit.
Last but not least, here is one of the two nighties I made up, again using PD. They are from a custom colour run from Ressy last year. The pattern is a vintage one that I bought from Lanetz Living, a wonderful little webstore with plenty of nice surprises hiding in there! I wanted to have something feminine but not frou frou and still be slightly sexy. So, I chose view C.
 The first version eliminated the tie opening as I will be staying at the DMIL's house for the next week! So, I simply filled in the void from the opening and then gathered it all in. I love the fit of the skirt! The second one (for home use only) has the tie opening and is in a nice dark raspberry pink. It fits a bit more snug without the extra fabric at CF, but it fills the bill as a "birthday present" for the Pilot!
That is all for now ... I have to go do that last minute laundry and get the kids packed (not to mention me and the Pilot), book the cab for tomorrow, oh yeah and finish adding neck bands to Monkey Boy's T's ... do you think I can squeeze in another simple T for myself? grin ... you never know! I am in the groove to be sure!
Thursday, July 24, 2008
Project Runway tidbits
Last week or so, I was reading Tom & Lorenzo over at Project Rungay and saw the listing of contestants for PR5 in the US. I saw that there was a contestant who says she trained in OTTAWA CANADA! COOL ... a local type gal to root for! So, I quickly sent a note to my pal Darrell Thomas and sent him the link. Turns out he knows her from school, she was the year behind him. That is two seasons in a row he has known a contestant!
Darrell also mentioned that the producers had dropped into the shop to see if it was suitable for the show. Turns out that he is a little too small, although they did like his selection! "Darrell," I told him, "time to get a new building that is bigger and better for next season!" "Already looking" he sent back! I thought that this was going to be a single episode for PR Canada until I read today's local paper ... read on! PR Canada is coming to my home town! YUP! Ottawa is getting IMAN for the summer ... too bad I no longer work downtown and can't stalk the fabric shop where I (and Darrell) suspect they will be shopping and working!
I am trying really hard not to read PRungay right now as I want to wait until the show airs up on our side of the border ... but seeing as PR Canada will be starting to shoot locally soon, I guess I can't complain!
Darrell also mentioned that the producers had dropped into the shop to see if it was suitable for the show. Turns out that he is a little too small, although they did like his selection! "Darrell," I told him, "time to get a new building that is bigger and better for next season!" "Already looking" he sent back! I thought that this was going to be a single episode for PR Canada until I read today's local paper ... read on! PR Canada is coming to my home town! YUP! Ottawa is getting IMAN for the summer ... too bad I no longer work downtown and can't stalk the fabric shop where I (and Darrell) suspect they will be shopping and working!
I am trying really hard not to read PRungay right now as I want to wait until the show airs up on our side of the border ... but seeing as PR Canada will be starting to shoot locally soon, I guess I can't complain!
Saturday, May 31, 2008
Catch up & Contracts!
WOW! Has it really been almost two months since I last posted??!!! I know I had taken a break, but I didn't realize how long it had been until I signed in today! Time to make up for some lost time, I think! I have been extremely busy with work as I organized a charity BBQ and then finished the Scouting year and had birthdays, and also, I bought myself some time with a trainer at the gym where I work (staff discounts are amazing!). So, 2 days a week, this wonderful young woman puts me through my paces. As a result, in the past 13 sessions, I have managed to drop one. whole. inch! off my thighs and about the same off my upper chest. Now that summer is here, I am going to work earlier so that I can have the afternoons with the kids. THERE is where a lot of my time is being spent!
Sewing wise, I have actually been making some headway ... I took that jacket tailoring class with Darrell, started a skirt, sewn a bra, designed and finished a skort for the gym, a PD T w/piping (also for the gym), made one spectacular PD nightie (according to the Pilot, that is) and have the obligatory T's for Monkey Boy on the table sitting next to a second nightie.
Now for the details, the jacket is unfinished. Partially because I stalled on the armscye fit. It was beautiful in the muslin, but the wool has a different hand, so it fits differently. At least that was the initial reason. Now, it lies in stasis due to the fact that I am in a massive flux of measurements. So, that bra that I made? IT now needs me to adjust the cups. The jacket, it needs some taking in at the back and hips. The PD T formerly known as a TNT? IT needs some serious taking in at the seams. You really know you are losing inches when you sew even though the scale isn't varying much!
So, as you can probably guess, I am really pumped about this training program! The real proof of the success came over the weekend when I attempted to attack the mending pile. In there were the green wool pants that I made at Darrell's class two winters ago. They fit oh so perfectly ... then. Time (and split seams) had relegated them to the mending pile until they fit once again. Well, my little voice dared me to fix the seam and try them on. So, I restitched the CB seam, needing to take it in about 1/4" (there was a weak spot I needed to avoid) and then pressed and tried them on. WOWSERS! They fit as beautifully as they did when I made them! So, what were my skinny pants weren't skinny enough! How cool is that? To top it all off, that little nightie that I made up, is in a 10-12! I usually sew a 12-14 w/FBA, and this is for a knot, so I didn't really bother with it other than to lengthen the upper bodice and use 3/8" s.a. at the s.s., so I was prepped for some snugness, but the fit is dreamy! There is a second one on the table now, only this one has the drawstring keyhole opening at CF ... this is the one that doesn't get worn at the DMIL's next week when we arrive! It is reserved for the cabin at the beach!
Here is a little tidbit that a friend sent along to me the other day. If this photo isn't a scream for help in sewing, I don't know what is! Look closely and see what you think ...
 This was taken in front of the Walmart in Gardendale, Alabama. This is hysterical! Look at it closely. Now I ask you... Who sits and looks at a pair of men's briefs and says hmmmm...I can make a nice summer top from these!! On the other hand...$6 for a three pack is a good price!! Now that this person knows what the scissors are for, maybe they can try sewing something??? PLEASE????!!!
I am now off to work! I will post photos tonight (I PROMISE, MB! Mt Laundry consumed me last night ...).
Sewing wise, I have actually been making some headway ... I took that jacket tailoring class with Darrell, started a skirt, sewn a bra, designed and finished a skort for the gym, a PD T w/piping (also for the gym), made one spectacular PD nightie (according to the Pilot, that is) and have the obligatory T's for Monkey Boy on the table sitting next to a second nightie.
Now for the details, the jacket is unfinished. Partially because I stalled on the armscye fit. It was beautiful in the muslin, but the wool has a different hand, so it fits differently. At least that was the initial reason. Now, it lies in stasis due to the fact that I am in a massive flux of measurements. So, that bra that I made? IT now needs me to adjust the cups. The jacket, it needs some taking in at the back and hips. The PD T formerly known as a TNT? IT needs some serious taking in at the seams. You really know you are losing inches when you sew even though the scale isn't varying much!
So, as you can probably guess, I am really pumped about this training program! The real proof of the success came over the weekend when I attempted to attack the mending pile. In there were the green wool pants that I made at Darrell's class two winters ago. They fit oh so perfectly ... then. Time (and split seams) had relegated them to the mending pile until they fit once again. Well, my little voice dared me to fix the seam and try them on. So, I restitched the CB seam, needing to take it in about 1/4" (there was a weak spot I needed to avoid) and then pressed and tried them on. WOWSERS! They fit as beautifully as they did when I made them! So, what were my skinny pants weren't skinny enough! How cool is that? To top it all off, that little nightie that I made up, is in a 10-12! I usually sew a 12-14 w/FBA, and this is for a knot, so I didn't really bother with it other than to lengthen the upper bodice and use 3/8" s.a. at the s.s., so I was prepped for some snugness, but the fit is dreamy! There is a second one on the table now, only this one has the drawstring keyhole opening at CF ... this is the one that doesn't get worn at the DMIL's next week when we arrive! It is reserved for the cabin at the beach!
Here is a little tidbit that a friend sent along to me the other day. If this photo isn't a scream for help in sewing, I don't know what is! Look closely and see what you think ...
 This was taken in front of the Walmart in Gardendale, Alabama. This is hysterical! Look at it closely. Now I ask you... Who sits and looks at a pair of men's briefs and says hmmmm...I can make a nice summer top from these!! On the other hand...$6 for a three pack is a good price!! Now that this person knows what the scissors are for, maybe they can try sewing something??? PLEASE????!!!
I am now off to work! I will post photos tonight (I PROMISE, MB! Mt Laundry consumed me last night ...).
Sunday, April 06, 2008
First off I want to thank Mary Beth for nominating my site as an excellent blog site. I am reserving the right to tag people at a later time. I only read a few blogs, you see and am nowhere near the required 10, so I am not going to post the award. In this case, it really is great to be nominated! I love the history of this blog award (and I shamelessly quote Mary Beth quote here):
So, in that spirit, I want to introduce you to a new blog I found. It is written by a lady who exercises at the gym where I work. I was directed to her site by my dear friend Darrell Thomas who thought we might get along. Imagine my surprise when I saw her picture on the blog and realized she is a lady I see almost every day and whom I also work out with on occasion (OK we are training partners for 6 weeks of "Boot Camp" run by one of the trainers on staff). She is a wonderful person and I love the detail she is putting into her work and her blog. Right now, she is finishing off a Chanel styled jacket out of a pink silk, complete with bound buttons and piped seams. So, go get a cuppa and sit a spell and read along with at Julia's sewing blog.
So, what is new here? I started my tailored jacket class at Darrell's two weeks ago. We are using Burda 8300 for the class. Darrell is making us use bound buttonholes, welt pockets and by unanimous decision, we are all leaving out the back vent. We are using industrial techniques otherwise. Last week we had our muslins fitted and then watched him put the main body together. Nothing surprising there so far. But it is nice to be with others in a group; like a directed sew along combined with the humour of the stitch and bitch we tried last year.
So, I went along with my muslin and realized as I was sewing the fronts together that I had way too much fabric in the side panel compared to the front. Turns out I forgot to lengthen the front panel when I did my FBA on the side. DOH! So, when Darrell fitted my muslin, he tucked out the gap at the armhole and removed all that "extra fabric" that really wasn't extra. But he couldn't know that as he hadn't seen my pattern. So, today I redid one side and front panel and will see if it fits better tonight.
Another issue I had with the muslin was there didn't seem to be enough ease for me. I cut a 14, did my usual FBA of 1 1/2" but it seemed tight for a jacket. So, I went back and did 3/8" s.a. on all the vertical seams. Darrell kept them that way for almost all but the CB. That one he put back at 5/8", and the front seam above the bust apex he also took back into 5/8". I will play with that tonight as well. I have to have the fabric cut and the bodice fused and put together by Wednesday night's session. That is when we deal with the sleeves.
Don't ask me about what fabric I am using. What I intended to do and what I actually am doing may be two different things. I have a number of options in the stash, but most are spoken for other jacket projects. I had planned on using a silk wool blend that I bought with my DMIL's annual GC from Fabricland. I did not want this to be dryclean only, so I put it in the washer on delicate in cold with Woolite. I am not sure if the results are a quality issue or just ignorance on my part, but there was so much fuzz in the washer after that it took me 5 minutes to clear it all out and clear the floor of it! It really changed the hand of the blend. It is much more fluffy and thick despite no dryer time. Careful pressing has improved it somewhat, but I am not quite satisfied yet. I will try again when it is completely dry. I might have to swap fabrics and projects. I have some nice wool flannel that is a perfect weight and have more than enough for this project as well as a HP Sportive Suit jacket and maybe even a skirt ... I'll let you know when the decision is made!
It is bedtime for the kids and almost time for me to head downstairs, so I will be saying g'night for now. Enjoy reading Julia's musings and if you post, tell her Lorna sent you! I'd love to hear how many new readers she will gain between now and our next work out!
it’s wound it’s way through blog communities interested in child rearing, homeschooling, literary arts, and spiritual life, to name a few, landing here in the sewing community just latelyI love the fact that it is not restricted to one topic. I started Newman's Needle as a place to put my swing projects out there for reflection and assistance and as a means of putting more info out there than would normally be in my reviews that I post at Pattern Review . It has since developed into a bit more, encompassing the kids, the Pilot, the Job and Scouting as well since everything in my life tends to veer towards sewing once way or another, I see this as a positive evolution in my blogging, however I am trying to stick to more sewing content and leave the personal info to private e-mails.
So, in that spirit, I want to introduce you to a new blog I found. It is written by a lady who exercises at the gym where I work. I was directed to her site by my dear friend Darrell Thomas who thought we might get along. Imagine my surprise when I saw her picture on the blog and realized she is a lady I see almost every day and whom I also work out with on occasion (OK we are training partners for 6 weeks of "Boot Camp" run by one of the trainers on staff). She is a wonderful person and I love the detail she is putting into her work and her blog. Right now, she is finishing off a Chanel styled jacket out of a pink silk, complete with bound buttons and piped seams. So, go get a cuppa and sit a spell and read along with at Julia's sewing blog.
So, what is new here? I started my tailored jacket class at Darrell's two weeks ago. We are using Burda 8300 for the class. Darrell is making us use bound buttonholes, welt pockets and by unanimous decision, we are all leaving out the back vent. We are using industrial techniques otherwise. Last week we had our muslins fitted and then watched him put the main body together. Nothing surprising there so far. But it is nice to be with others in a group; like a directed sew along combined with the humour of the stitch and bitch we tried last year.
So, I went along with my muslin and realized as I was sewing the fronts together that I had way too much fabric in the side panel compared to the front. Turns out I forgot to lengthen the front panel when I did my FBA on the side. DOH! So, when Darrell fitted my muslin, he tucked out the gap at the armhole and removed all that "extra fabric" that really wasn't extra. But he couldn't know that as he hadn't seen my pattern. So, today I redid one side and front panel and will see if it fits better tonight.
Another issue I had with the muslin was there didn't seem to be enough ease for me. I cut a 14, did my usual FBA of 1 1/2" but it seemed tight for a jacket. So, I went back and did 3/8" s.a. on all the vertical seams. Darrell kept them that way for almost all but the CB. That one he put back at 5/8", and the front seam above the bust apex he also took back into 5/8". I will play with that tonight as well. I have to have the fabric cut and the bodice fused and put together by Wednesday night's session. That is when we deal with the sleeves.
Don't ask me about what fabric I am using. What I intended to do and what I actually am doing may be two different things. I have a number of options in the stash, but most are spoken for other jacket projects. I had planned on using a silk wool blend that I bought with my DMIL's annual GC from Fabricland. I did not want this to be dryclean only, so I put it in the washer on delicate in cold with Woolite. I am not sure if the results are a quality issue or just ignorance on my part, but there was so much fuzz in the washer after that it took me 5 minutes to clear it all out and clear the floor of it! It really changed the hand of the blend. It is much more fluffy and thick despite no dryer time. Careful pressing has improved it somewhat, but I am not quite satisfied yet. I will try again when it is completely dry. I might have to swap fabrics and projects. I have some nice wool flannel that is a perfect weight and have more than enough for this project as well as a HP Sportive Suit jacket and maybe even a skirt ... I'll let you know when the decision is made!
It is bedtime for the kids and almost time for me to head downstairs, so I will be saying g'night for now. Enjoy reading Julia's musings and if you post, tell her Lorna sent you! I'd love to hear how many new readers she will gain between now and our next work out!
Friday, March 21, 2008
Bunnies In Betsy
Well, I am finished. I just spent an hour taking apart Betsy and entering into areas I have not ventured into before. She is an older Singer machine, so there is not much to do. There is still lots of goop on the gears and I added some oil where needed. When I took the base off (something I had never done before) I realized that there was MUCH more lint hiding under there in places I was not reaching with my previous cleans. I think there was a whole bunnie in there, there was so much lint ... it was almost frightening to see how much I missed. I then removed the top and took a close look in there as well. Not as much lint, but I did give a good run through adding oil where needed. I then took a piece of scrap silk and ran it behind the tension plates and then around them. If that didn't work it was going to be dental floss next! Test run with no tension then ratcheting it up to where my normal 3 proved Betsy to be in perfect condition once more! Yippee!!
When we get back from Mass this afternoon I am going to do some fast work on some Easter clothes for Monkey Girl and I. Due to the snow amounts still on the ground up here, dresses are out of the question. So, now I need to decide what I can pull off in 2 days and what fabric to choose ... Life could be a lot worse right now, methinks!
When we get back from Mass this afternoon I am going to do some fast work on some Easter clothes for Monkey Girl and I. Due to the snow amounts still on the ground up here, dresses are out of the question. So, now I need to decide what I can pull off in 2 days and what fabric to choose ... Life could be a lot worse right now, methinks!
Thursday, March 20, 2008
Betsy and Bunnies ...
I have not managed to take Betsy in yet. Tuesday night was a flurry of post Report card activity here. We always take the kids out for dinner on report card day. This term, they managed to keep the arrival date a secret until they came home, so I was TOTALLY unprepared schedule wise. Going out made for a perfect solution considering I had a meeting to go to afterwards. No dishes! Yippee for Wendy's! Last night was a quiet night as the Pilot had to work late and we had planned on celebrating being able to see the deck again by having our second BBQ this week. The fact that it was snowing lightly (again/still) while we were doing it and that there is still a whack of snow is irrelevant. I. NEED. BBQ! So, I got me some BBQ. YUMMY pork chops ... but still no Betsy in the shop. Am I in denial or just afraid of what I might hear ... Tomorrow I am going to play with Betsy some more and see if I can get her working. As much as I want a new machine, it isn't in the budget yet. Betsy it is for now! I did manage to get the green T shirt done on the serger, though. I almost kissed that machine ... after I stopped cursing the wooly nylon that kept breaking on me. I think it has gone rotten on me. It was breaking as I was pulling on it straight off the spool. Not too happy about that, but I am not surprised, really. It had been sitting for a while. I just hope I can get the old gal working, I want some new Easter clothes! I really want to use up some of that Rayon knit from Ressy ... which means I can use the serger, but that I will have to hand hem. ick.
Tonight is the start of Holy Week for us. Hamster Boy served his first Holy Thursday Mass tonight. He didn't get his feet washed, but he did get to ring them bells throughout the litany of the saints. His arm is a bit sore, he says now ... but he enjoys being up on the altar. He says that being part of the Mass is easier when you get to "do stuff". I am not going to argue him on that one! He has declared that he knows that the "idea of a human sized rabbit travelling the world dropping chocolate and eggs in one night is highly unrealistic" but that he won't ruin it for Monkey Girl. Hoping he could pull it off, I hugged him and invited him to come along with me when I go get the last minute items (like the afore mentioned chocolates). He gleefully said yes. Which means he wants to pick his own chocolate, I think! Smart boy! How smart? Well, when playing on the computer the other day, he stopped his work, turned to his little sister and related the following (with a straight face I might add) WARNING: If you are drinking coffee, tea, wine or other liquids, swallow now and put the cup down! giggle alert ...
Tonight is the start of Holy Week for us. Hamster Boy served his first Holy Thursday Mass tonight. He didn't get his feet washed, but he did get to ring them bells throughout the litany of the saints. His arm is a bit sore, he says now ... but he enjoys being up on the altar. He says that being part of the Mass is easier when you get to "do stuff". I am not going to argue him on that one! He has declared that he knows that the "idea of a human sized rabbit travelling the world dropping chocolate and eggs in one night is highly unrealistic" but that he won't ruin it for Monkey Girl. Hoping he could pull it off, I hugged him and invited him to come along with me when I go get the last minute items (like the afore mentioned chocolates). He gleefully said yes. Which means he wants to pick his own chocolate, I think! Smart boy! How smart? Well, when playing on the computer the other day, he stopped his work, turned to his little sister and related the following (with a straight face I might add) WARNING: If you are drinking coffee, tea, wine or other liquids, swallow now and put the cup down! giggle alert ...
One of my friends at school brought in a really neat article from the news today in class. It was about the Easter Bunny. Last year, somebody tested the Easter Chocolate that had been left behind on Easter and guess what? They found RABBIT DNA on the eggs and candy wrappers. So that just proves that the Easter Bunny is real!Those of you who don't know my kids won't realize that Hamster Boy is quite the science sponge. He absorbs anything paleontology related and loves history and science. Mythbusters is one of his fave shows. So, the discussions around our house are often laden with words like DNA and evolution, laws of motion and the like. So, to hear her big brother come out with a statement about Bunny DNA on Easter candy would make complete rational sense to her. After all, this is the same person who explains how birds, turtles and alligators are "actually living dinosaurs who have not needed to evolve past their present state." There, now, my friends, take a moment and breathe a bit. Laughter is great, but oxygen is also needed! :)
Subscribe to:
Posts (Atom)

