The "new" serger arrived yesterday. I threw together a TNT pattern to test it out. I used a silkweight powerdry to line an unruly sweater knit in a pullover top. It is amazing how differential feed makes certain fabrics behave! This is just what I needed to get out of a bit of a sewing slump.
I just finished the lining muslin for the coat. I needed to take a short break to prep a chicken for supper. This can prevent so much hurt from happening. I am going to start cutting as soon as that bird is in the oven! I am going to start with the lining and then work my way out so that I can adjust up as I go if I need to. I don’t have enough of the silk charmeuse to do the sleeve lining, so I either have to go see Darrell or use some other fabric in the stash for the sleeve linings. Seeing as I have used my fabric budget for December already, I think I may hide the poly in the sleeves. So, I will cut the lining and facings today and then I should be able to get them interfaced and stay stitched soon. If nothing else, I will get to finish the edges of the fabrics with the new machine (any excuse to use the new one!)
The Pilot is home for an extended weekend and I am getting my hair done tomorrow and I may even do some more Christmas shopping if I get brave enough to go to Toys R Us on a Saturday ... I still need to get this year's Lego instalment for the kids. Girl Monkey is finally getting her own box so that she can stop bugging her brother!
Showing posts with label Muslins. Show all posts
Showing posts with label Muslins. Show all posts
Thursday, December 14, 2006

Thursday, December 07, 2006
Knowing When to Stop
I was reading a thread over at SG the other day about slowing down your sewing to gain more accuracy in order to prevent mistakes. I agree with that and posted my own rule about stopping at collars, cuffs, sleeves and waistbands. When tired, these are the places most likely to require frog stitching the next day. As I attacked yet another mod in my attempt at drafting the perfect cut on hooded shawl collar for my HP coat, I realized that I need to stop. I have done 4 versions and none have worked and I am no closer to the vision in my head. However, there is snow on the ground and more coming. The temps are steadily around the freezing point and lower. I need to have this coat finished so that I can wear it. It is not yet cold enough for the down coat already in the closet, but it is getting too cold for just the Gore-Tex and a sweater.
So, last night I took the muslins and started to cut back the hood to leave just a widened shawl collar. I then made the changes to the pattern. I have tweaked the fit enough that I think it will be a good fit. I am going to finish the lining muslin tonight and then I am going to cut the windbloc interlining. If it feels right between the muslins, I will then go and start cutting the real thing.
Why wait till tonight when I had all afternoon? Because I have to design the layout of 3 pages for the in laws family calendar and I really have to finish painting the dining room. We have one wall left to do, but I can't do that one as it involves moving the china cabinet and removing all the contents ahead of time. Need to have the Pilot here for that one. What is the good of him working out at the gym and staying so buff if I can't drool over him once in a while while he works, right? So, I will start the calendar pages once I am finished here and then take them to the Posties.
When I get home, I will put on some music from Loreena MacKennit's new album. I love the blends of cultures in her music. Her music is what I imagine ancient bards used to be. When I listened to this one clip, I realized that I had not bought any of her latest albums. I have 2 or 3 already, but this one I love! I love the fusion of the eastern and western music. Sting has another track I love for the same reason ... I love his song "Desert Rose". Great sewing music, even the little monkey loves it. It "helps [her] concentrate" when she is sewing, she says.
The Pilot has another week of work away before his 2 week break, so I am going to get a late start on the holiday sewing marathon this year. Usually I get going after the second Sunday of Advent as he occupies the kids at night and I disappear into the sewing room. I have't even gone looking for fabric for the DD's dress yet, let alone started Pilot's new shirt muslin or even my own holiday clothes. Then again, if I cam going to get that HP Trumpet skirt done, I am going to need some boots to go with it ... So, which comes first, the skirt or the boots? Shoe divas, help me out here!
Some good news, although I said I was going to wait and save my money for a new serger, the need to reward myself for those casual hours and saving $ combined with the Scottish genes from my father. Last week I found a New Home 234 D serger in excellent shape on eBay. I tried real hard to not get my hopes up as I did with that Janome that I lost. But God was with me on this one. I was the only bidder and got the serger for $75 plus shipping. I had the shipping costs already in the Paypal account from selling a few back issues of WOF that I no longer wanted. Combined with the money I earned/saved, I had enough saved that the post shipping tune up will be paid for as well!
So, by next week, when I am ready to start sewing the wool and silk, I will have a differential feed serger in the shop, ready to play ... Good thigns come to those who wait. Last week, somebody else waited to the last minute and took the other machine and now I have one as well. Patience and persistance to pay off! And I paid less for this one which make sit even better in my books! This machine is not TOL, but it will last me a few more years as I get used to using 2 needles and the diff feed. Hopefully it will last a long time and I can start saving for an actual new sewing machine. That one will not be an eBay buy as I want to test drive many different brands. The German blood in me wants a Pfaff, but I really like the Huqvarnas ... lots of feet to play with. And button holes are a big issue with me. I will be doing lots of road testing on my own fabric swatches once I am able to actually go out and buy. Of course, this could happen as soon as this fall if we are posted ... I get a share of the next leftover posting $ for my workshop. The last one went to a table saw, shop vac, drill press, new drill and numerous hand tools. None of which I mind, BTW.
We have a deal, the Pilot and I. As much as he spends in his shop, I get to spend in mine. And we only count items bought brand new, not used items. So far, I am at a potential buy of about $1000 (Canadian). Now, if only I can convince him to get that chop saw ... Of course all of this has an ulterior motive. He has promised that when he removes his uniform, and we have settled into our home of choice, he will build me a custom workshop. Considering that is at least another 10 years off, I/we have lots of gear to buy to deserve the wonderful shop I am envisioning ...
So, last night I took the muslins and started to cut back the hood to leave just a widened shawl collar. I then made the changes to the pattern. I have tweaked the fit enough that I think it will be a good fit. I am going to finish the lining muslin tonight and then I am going to cut the windbloc interlining. If it feels right between the muslins, I will then go and start cutting the real thing.
Why wait till tonight when I had all afternoon? Because I have to design the layout of 3 pages for the in laws family calendar and I really have to finish painting the dining room. We have one wall left to do, but I can't do that one as it involves moving the china cabinet and removing all the contents ahead of time. Need to have the Pilot here for that one. What is the good of him working out at the gym and staying so buff if I can't drool over him once in a while while he works, right? So, I will start the calendar pages once I am finished here and then take them to the Posties.
When I get home, I will put on some music from Loreena MacKennit's new album. I love the blends of cultures in her music. Her music is what I imagine ancient bards used to be. When I listened to this one clip, I realized that I had not bought any of her latest albums. I have 2 or 3 already, but this one I love! I love the fusion of the eastern and western music. Sting has another track I love for the same reason ... I love his song "Desert Rose". Great sewing music, even the little monkey loves it. It "helps [her] concentrate" when she is sewing, she says.
The Pilot has another week of work away before his 2 week break, so I am going to get a late start on the holiday sewing marathon this year. Usually I get going after the second Sunday of Advent as he occupies the kids at night and I disappear into the sewing room. I have't even gone looking for fabric for the DD's dress yet, let alone started Pilot's new shirt muslin or even my own holiday clothes. Then again, if I cam going to get that HP Trumpet skirt done, I am going to need some boots to go with it ... So, which comes first, the skirt or the boots? Shoe divas, help me out here!
Some good news, although I said I was going to wait and save my money for a new serger, the need to reward myself for those casual hours and saving $ combined with the Scottish genes from my father. Last week I found a New Home 234 D serger in excellent shape on eBay. I tried real hard to not get my hopes up as I did with that Janome that I lost. But God was with me on this one. I was the only bidder and got the serger for $75 plus shipping. I had the shipping costs already in the Paypal account from selling a few back issues of WOF that I no longer wanted. Combined with the money I earned/saved, I had enough saved that the post shipping tune up will be paid for as well!
So, by next week, when I am ready to start sewing the wool and silk, I will have a differential feed serger in the shop, ready to play ... Good thigns come to those who wait. Last week, somebody else waited to the last minute and took the other machine and now I have one as well. Patience and persistance to pay off! And I paid less for this one which make sit even better in my books! This machine is not TOL, but it will last me a few more years as I get used to using 2 needles and the diff feed. Hopefully it will last a long time and I can start saving for an actual new sewing machine. That one will not be an eBay buy as I want to test drive many different brands. The German blood in me wants a Pfaff, but I really like the Huqvarnas ... lots of feet to play with. And button holes are a big issue with me. I will be doing lots of road testing on my own fabric swatches once I am able to actually go out and buy. Of course, this could happen as soon as this fall if we are posted ... I get a share of the next leftover posting $ for my workshop. The last one went to a table saw, shop vac, drill press, new drill and numerous hand tools. None of which I mind, BTW.
We have a deal, the Pilot and I. As much as he spends in his shop, I get to spend in mine. And we only count items bought brand new, not used items. So far, I am at a potential buy of about $1000 (Canadian). Now, if only I can convince him to get that chop saw ... Of course all of this has an ulterior motive. He has promised that when he removes his uniform, and we have settled into our home of choice, he will build me a custom workshop. Considering that is at least another 10 years off, I/we have lots of gear to buy to deserve the wonderful shop I am envisioning ...
Wednesday, November 29, 2006
Muslin #2
Well, the second muslin is 98% together. I miscalculated something. When reviewing the Threads articles on adding warmth and inter-linings to coats, they both recommended using a size up in the coat to allow for the extra layer. I had not done that, so I cut out the wafflecloth with extra 5/8" s.a. and sewed a normal 5/8". Sounds normal enough, except that I forgot to add to the back neck seam on the hood/collar. So, I can't attach the neck to the coat. The hood is still not quite right, either so I have to play with that a bit more yet. Otherwise, it looks much better and fits well over a sweater with lots of ease, so it should fit well over the lining and thermal layer. I am going to let the coat hang so that the bias will stretch before I do anything else to that. I added an FBA of 1" and then removed the dart. In the lining, I rotated out the dart into the front seamline as there is an existing dart there. Now it is a bigger one!
I am going to put together a muslin of the lining tonight as I want to see how it all goes together. This will also allow me to try out my latest hood fix on the front facing. I have some poly from the stash to do that up. I am taking a break now and will get back at it after the monkeys are in bed. I want to get lots done over the next day or so as the Pilot comes home for the weekend again. We are having a family photo taken this weekend. A friend is a pro photographer and he is doing this as a favour to me. I will have to make him something special. As he is another Scout leader, maybe I can make him a campfire blanket/poncho. Or one for his son ... he won't take any $ for this. As a freelancer he shoudl get something for his time, don't you think?
I am going to put together a muslin of the lining tonight as I want to see how it all goes together. This will also allow me to try out my latest hood fix on the front facing. I have some poly from the stash to do that up. I am taking a break now and will get back at it after the monkeys are in bed. I want to get lots done over the next day or so as the Pilot comes home for the weekend again. We are having a family photo taken this weekend. A friend is a pro photographer and he is doing this as a favour to me. I will have to make him something special. As he is another Scout leader, maybe I can make him a campfire blanket/poncho. Or one for his son ... he won't take any $ for this. As a freelancer he shoudl get something for his time, don't you think?
Wednesday, November 22, 2006
HP Cherry Blossom Coat muslin #1
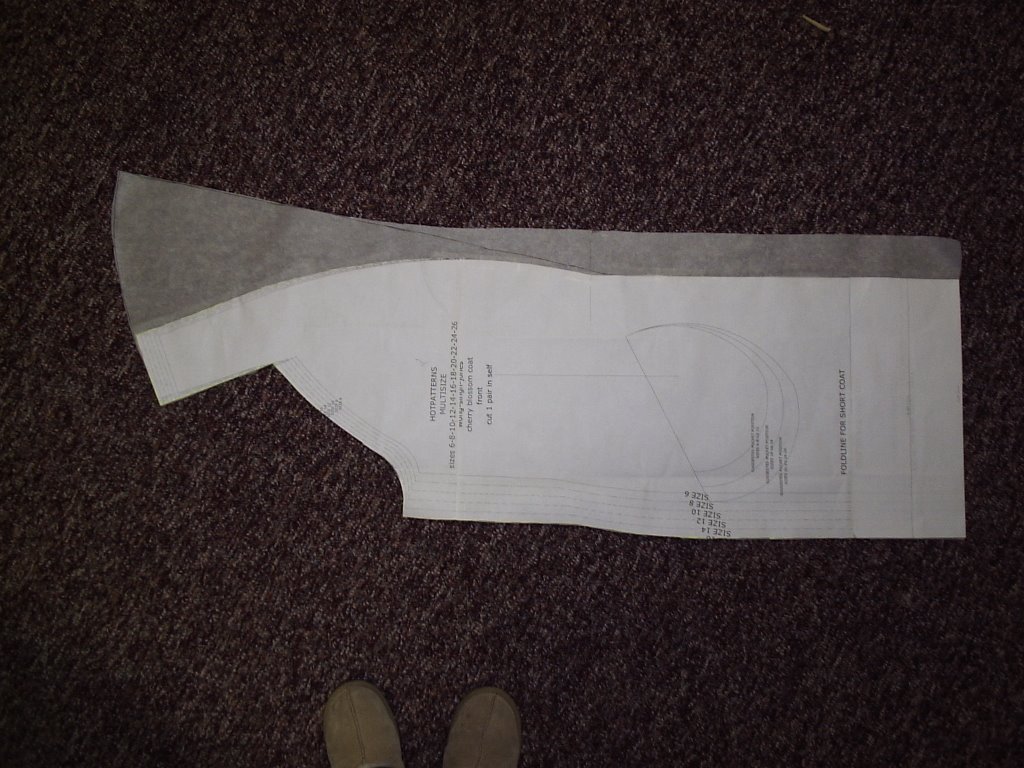
The first muslin is done. I made no alterations for fit but did make some style changes, the biggest being the addition of a cut on hood to the shawl collar.
I drafted what I thought would be right and then added it to the collar facing as it was smaller to deal with than the actual coat piece. It was good enough to show I was on the right track and then I went on to the first flannel attempt.
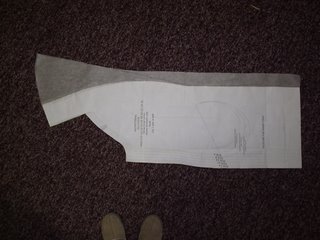
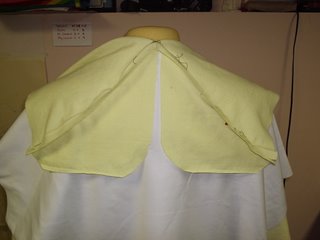
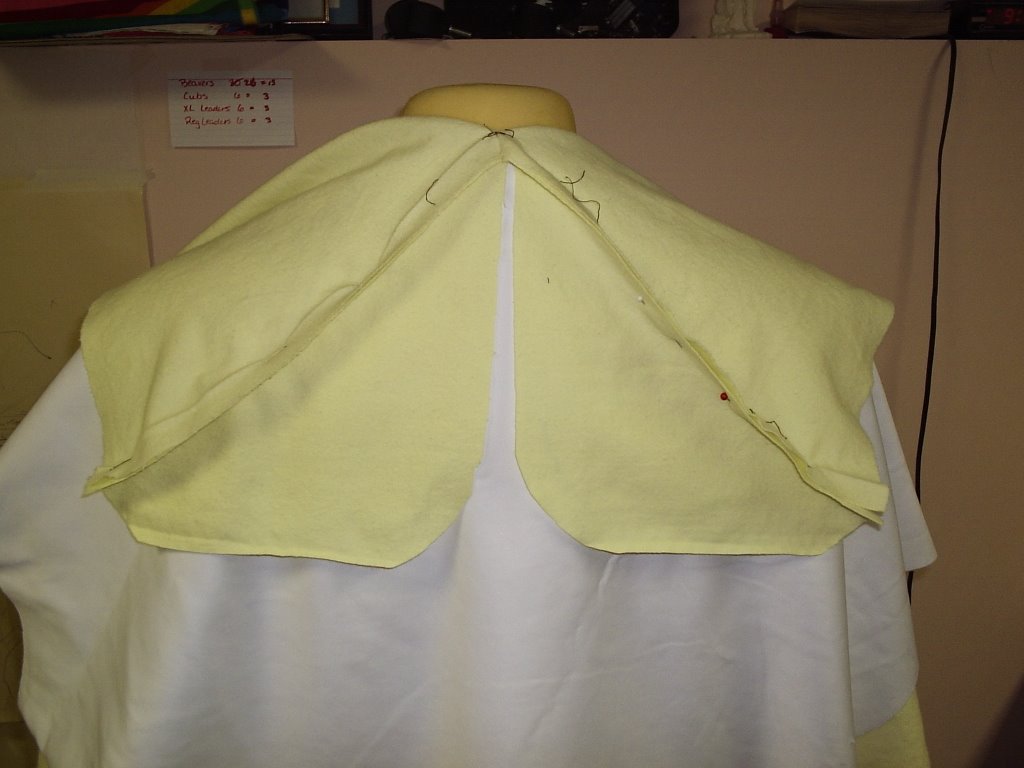
As I said before, the 2 piece sleeves are cut on the bias. I allowed another 5/8" s.a. on the sides of the sleeves and marked the original cut and seam lines. After constructing the entire coat, I tried it on without any extra layers underneath. I just wanted to see how the hood was lying. It needed some work, as it did not reach far enough in front to keep me warm. So, I ripped the basting out to about 3" from the neckline and then spread out the hood pieces to lie flat on the dummy. The space remaining was a triangle. So, I went to the scrap pile and added a piece to the space and pinned it together and tired it on. The wedge was still not quite enough, but it is closer. When I try the hood on, I see that I need to add another amount as the hood is too narrow at the top of my head.
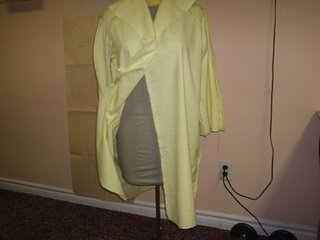
I then let Mindy try it on. I had cut out a 16 (for a 42" full bust) and did not do an FBA as I wanted to see how close it fit considering I am a 41" full bust. I knew it would have to be an FBA, but I wanted to discover just how much I needed in the muslin rather than just assuming the amount. The lines confirm, to my eyes anyway, that I need an FBA. The CF swings out and there are those drag lines pointing to the twins that mean I have to do a second muslin.
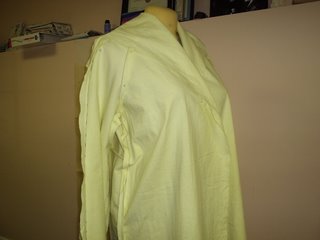
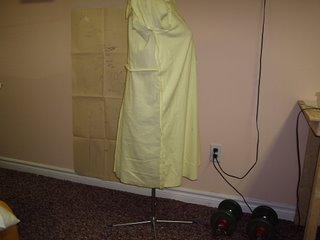
The other thing that I noticed was that I needed to take a dart out at the back. This stopped the s.s. from swinging forward. Does this mean I have a swayback?
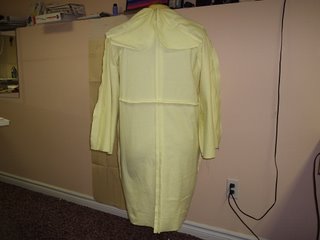
So, I am off to bed now, but will revisit all these changes tomorrow. First of all though, tomorrow is Coffee Day with the ladies. After that I have to do some more painting, then I will get to the second muslin.
I drafted what I thought would be right and then added it to the collar facing as it was smaller to deal with than the actual coat piece. It was good enough to show I was on the right track and then I went on to the first flannel attempt.
As I said before, the 2 piece sleeves are cut on the bias. I allowed another 5/8" s.a. on the sides of the sleeves and marked the original cut and seam lines. After constructing the entire coat, I tried it on without any extra layers underneath. I just wanted to see how the hood was lying. It needed some work, as it did not reach far enough in front to keep me warm. So, I ripped the basting out to about 3" from the neckline and then spread out the hood pieces to lie flat on the dummy. The space remaining was a triangle. So, I went to the scrap pile and added a piece to the space and pinned it together and tired it on. The wedge was still not quite enough, but it is closer. When I try the hood on, I see that I need to add another amount as the hood is too narrow at the top of my head.
I then let Mindy try it on. I had cut out a 16 (for a 42" full bust) and did not do an FBA as I wanted to see how close it fit considering I am a 41" full bust. I knew it would have to be an FBA, but I wanted to discover just how much I needed in the muslin rather than just assuming the amount. The lines confirm, to my eyes anyway, that I need an FBA. The CF swings out and there are those drag lines pointing to the twins that mean I have to do a second muslin.
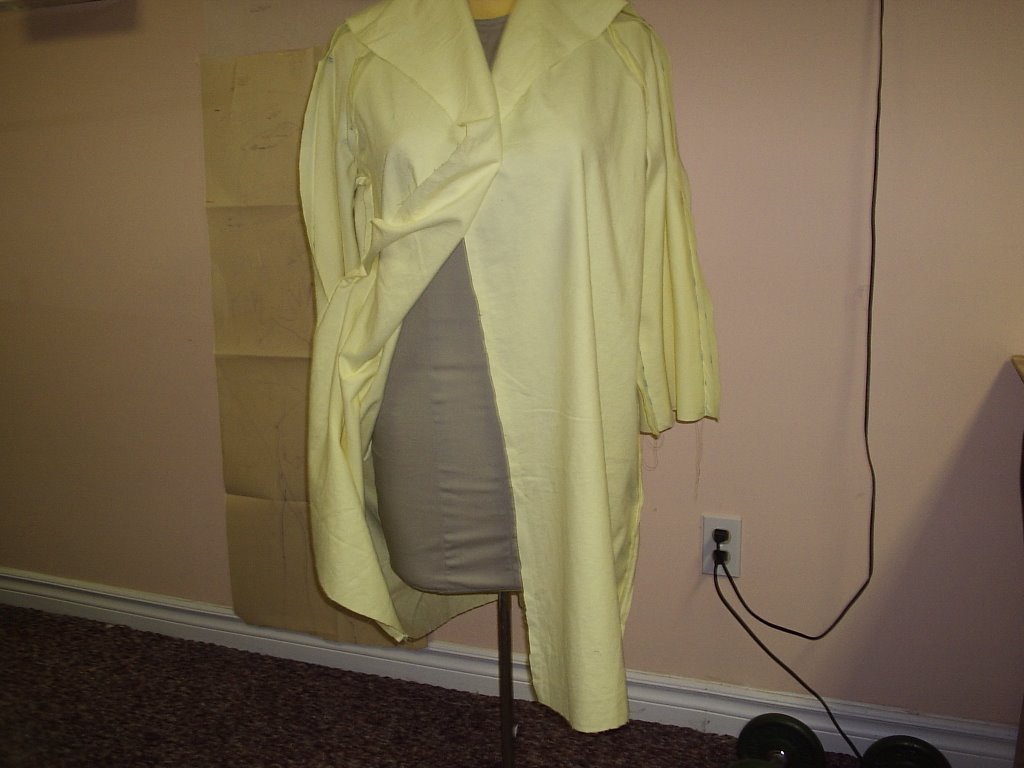

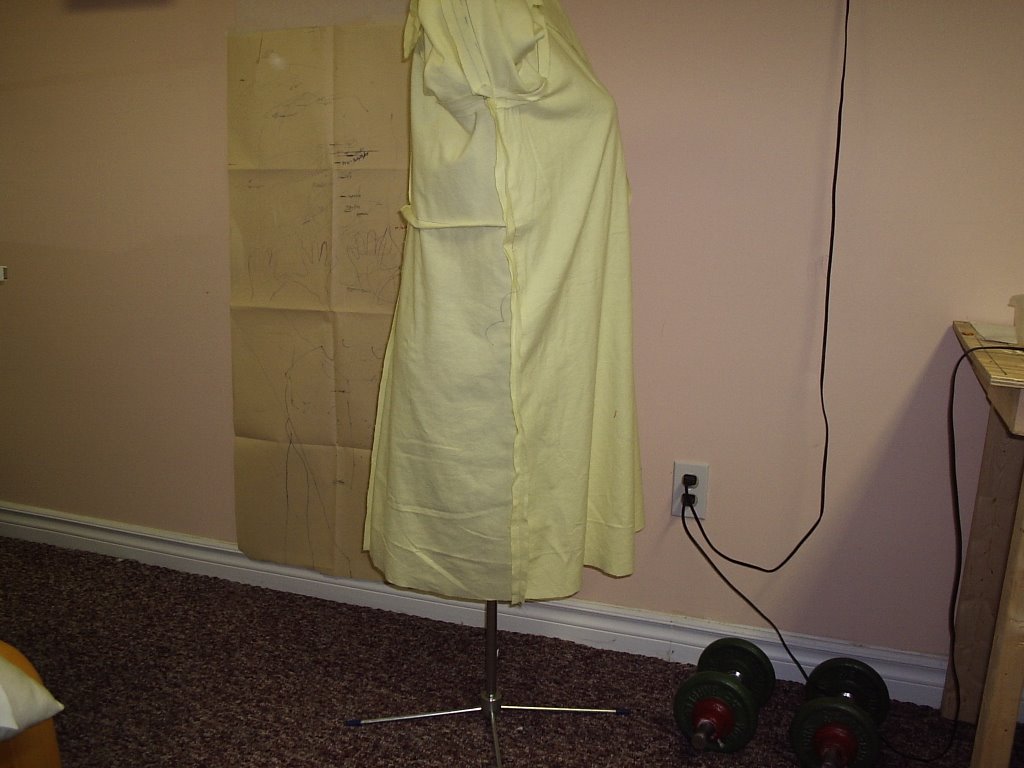
The other thing that I noticed was that I needed to take a dart out at the back. This stopped the s.s. from swinging forward. Does this mean I have a swayback?
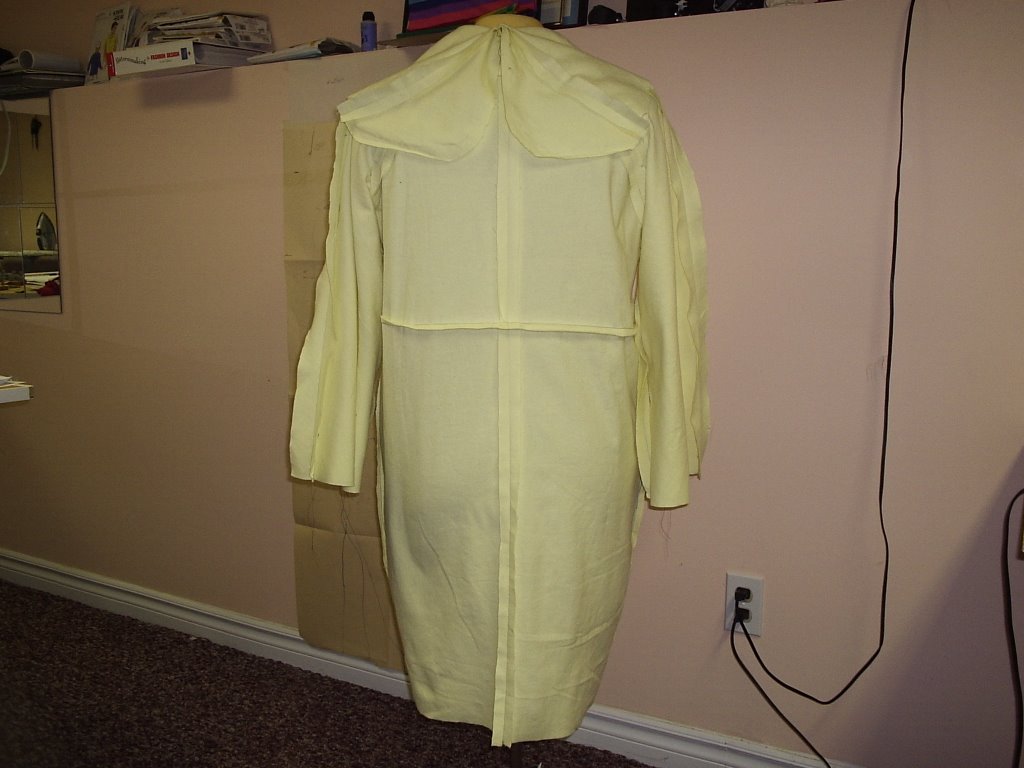
So, I am off to bed now, but will revisit all these changes tomorrow. First of all though, tomorrow is Coffee Day with the ladies. After that I have to do some more painting, then I will get to the second muslin.
Saturday, November 18, 2006
Delays, delays ...
I would love to be able to say that I have the muslin cut out and sewn together, but I can't. I was temporarily stumped by part of the layout. As I said before, the sleeves are on the bias. Lisa very nicely sent me a note with some advice on bias sleeves, including the tidbit that I should lay the pieces out at right angles to each other to preserve the drape. She sent me info from Roberta Carr (I later found the same info at Pattern Review) that has some lovely information in it. But for some reason, I was having problems seeing how to place the bias pieces at right angles to each other and still have them both remain on the bias. It took reviewing the Marcy Tilton article in Threads and actually seeing that (hear the "DOH!" I muttered to myself?) the pieces are laid on a single layer of fabric. It is not the Front and the Back pieces that are at right angles, but the left front and the right front that are done so. Same with the back sleeve pieces. So, brian block is over and I can get cutting now ...
How did I get around the block when each time I read the note, and sketched I kept seeing the same thing? By ignoring the cutting table and then re-arranging part of my workshop to allow me to bring in a TV and DVD player. I also moved my tabel back against the wall to give me floorspace. Now I can do my Pilates and attempt my new Yoga workouts in my shop. The goal is to do a workout prior to any sewing work once each day. That way I can't avoid the workouts due to toy placement on the rec room floor by the kids. After all, what kind of mother makes her kids destroy the forts built in front of a TV they can't watch (due to no cable hook up ;)) when I can just not work out, right? So, now the TV and DVD is in the corner of my workshop. I can now listen as I work at night and do a workout in the morning before I do any sewing/cutting. The problem now is that I have to do some serious vaccuuming and then buy a new one of those little drawer units to hold all the zips, elastics, trims and such that were sitting on the floor in a pile. And I have, unfortunately, rediscovered the mending pile ... not that I will let that stop me on the coat! It must acclimatize to its new location, right?
I'll post a photo of the new layout once I finish cleaning it up a bit more. Another advantage of the new layout is that I get to look up and see the kids' artwork while I sew!
The buzzer has gone off, so I must go and punch down the dough as the monkeys (supported by the Pilot) have asked me to make some cinnamon buns for their breakfasts this week. Then, while they are rising again, I'll go to the store ...
How did I get around the block when each time I read the note, and sketched I kept seeing the same thing? By ignoring the cutting table and then re-arranging part of my workshop to allow me to bring in a TV and DVD player. I also moved my tabel back against the wall to give me floorspace. Now I can do my Pilates and attempt my new Yoga workouts in my shop. The goal is to do a workout prior to any sewing work once each day. That way I can't avoid the workouts due to toy placement on the rec room floor by the kids. After all, what kind of mother makes her kids destroy the forts built in front of a TV they can't watch (due to no cable hook up ;)) when I can just not work out, right? So, now the TV and DVD is in the corner of my workshop. I can now listen as I work at night and do a workout in the morning before I do any sewing/cutting. The problem now is that I have to do some serious vaccuuming and then buy a new one of those little drawer units to hold all the zips, elastics, trims and such that were sitting on the floor in a pile. And I have, unfortunately, rediscovered the mending pile ... not that I will let that stop me on the coat! It must acclimatize to its new location, right?
I'll post a photo of the new layout once I finish cleaning it up a bit more. Another advantage of the new layout is that I get to look up and see the kids' artwork while I sew!
The buzzer has gone off, so I must go and punch down the dough as the monkeys (supported by the Pilot) have asked me to make some cinnamon buns for their breakfasts this week. Then, while they are rising again, I'll go to the store ...
Monday, November 13, 2006
On Making Muslins
This is a bit of an extension of Ann's post over at the Sewing Divas. She highly recommends muslins. I do as well. I started making muslins only a year ago when I took a seminar from Peggy Sagers on pant fit. Then I made a few more in my attempts at perfecting her pattern for me. Then I made a couple of HP patterns. Now I am sold on them. I have a stash of muslin fabrics that are under my cutting table. I baste them together and often pin strips of fabric to them to add where I need to. This has saved my life a couple of times already. One thing I have to get away from, though, is the hope that I can make each muslin "wearable" and use not expensive fabric, but nice stuff all the same. I have to take that next step and realize that there is a difference between a muslin and trial garment. Kathleen Fasanella at The Fashion Incubator has a great article on this. She differs between the muslin, the prototype and the actual garment. I Have to get into a 3(ish) step mindset on garment sewing (assumes my standard inital paper alterations like FBA already done):
Step 1: muslin/cheap-o fabric for fitting only, basted together and original markings traced on;
Step 2: muslin 2 for tweaking to ensure above steps necessary and right;
Step 3: trial linings done if needed first, for final tweak
Step 4: final garment take a deep breath and cut the good stuff!
I am trying to follow this for my coat, although I am taking a bit of a short cut here. My muslin is actually some old flannel that my Mom passed on to me. Seeing as I want to interline the coat with some flannel, I am making my first go at this in the flannel. I am using the coat pieces, not the linings as there are more pieces to the wrong side of this coat than there are the outer layer! It is easier to fit the actual coat at this stage than figure out all the facings and the lining pieces! If the adjustments I made to the pattern at the paper stage are good enough, then I will start fooling around with the lining in a cheaper fabric as well. The flannel will be serged to the cashmere and then I will have the lining and the thermal layers done separately. The thermal layer I will sew last as I am considering making it a zip in layer. If I do that, I will follow the Threads article on winterizing your coat (Threads #121, pp. 46-51).
Interesting fact of the HP coat ... although the raglan sleeves look fairly loose fitted, they (and the sleeve lining) are actually cut on the bias. I have not seen that before. I can't wait to see how they look in the flannel. Question: when I cut and assemble the coat and the lining layers, should I let them hang overnight before I attach the cuffs (which are cut on grain)?
I am amazed I got that far this weekend as the Hubby and I managed to paint the living room and then rearrange the furniture and prep 3 of 4 walls in the dining room for painting as well. We inherited a border that is not my taste and it is everywhere in the ground floor of the house! They even bordered the interior of the coat closet in the foyer and the powder room. After living with it for a year, it is time to make this house mine and add some warm tones and get that border gone! This week will see the dining room done but for one wall. The hubby won't be home for 2 weeks, so I am leaving the wall with the china cabinet on it till ge hets back. I can't move it alone and I don't want the china and crystal out for 3 weeks on the table with the kids around! More time for my coat that way, right?
Step 1: muslin/cheap-o fabric for fitting only, basted together and original markings traced on;
Step 2: muslin 2 for tweaking to ensure above steps necessary and right;
Step 3: trial linings done if needed first, for final tweak
Step 4: final garment take a deep breath and cut the good stuff!
I am trying to follow this for my coat, although I am taking a bit of a short cut here. My muslin is actually some old flannel that my Mom passed on to me. Seeing as I want to interline the coat with some flannel, I am making my first go at this in the flannel. I am using the coat pieces, not the linings as there are more pieces to the wrong side of this coat than there are the outer layer! It is easier to fit the actual coat at this stage than figure out all the facings and the lining pieces! If the adjustments I made to the pattern at the paper stage are good enough, then I will start fooling around with the lining in a cheaper fabric as well. The flannel will be serged to the cashmere and then I will have the lining and the thermal layers done separately. The thermal layer I will sew last as I am considering making it a zip in layer. If I do that, I will follow the Threads article on winterizing your coat (Threads #121, pp. 46-51).
Interesting fact of the HP coat ... although the raglan sleeves look fairly loose fitted, they (and the sleeve lining) are actually cut on the bias. I have not seen that before. I can't wait to see how they look in the flannel. Question: when I cut and assemble the coat and the lining layers, should I let them hang overnight before I attach the cuffs (which are cut on grain)?
I am amazed I got that far this weekend as the Hubby and I managed to paint the living room and then rearrange the furniture and prep 3 of 4 walls in the dining room for painting as well. We inherited a border that is not my taste and it is everywhere in the ground floor of the house! They even bordered the interior of the coat closet in the foyer and the powder room. After living with it for a year, it is time to make this house mine and add some warm tones and get that border gone! This week will see the dining room done but for one wall. The hubby won't be home for 2 weeks, so I am leaving the wall with the china cabinet on it till ge hets back. I can't move it alone and I don't want the china and crystal out for 3 weeks on the table with the kids around! More time for my coat that way, right?
Subscribe to:
Posts (Atom)
